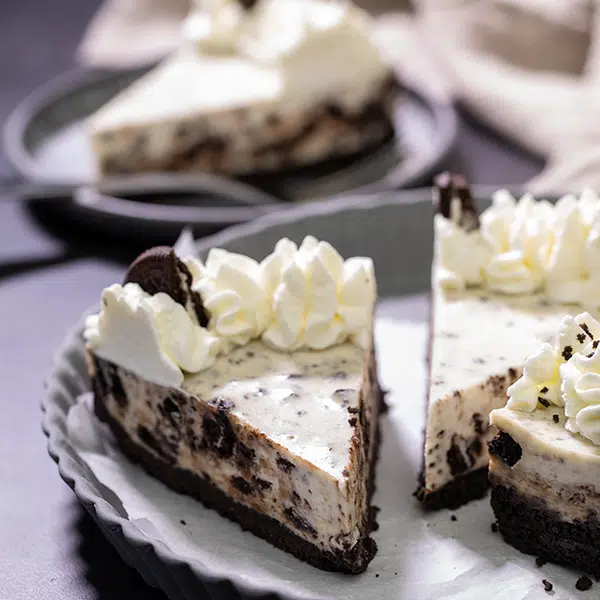
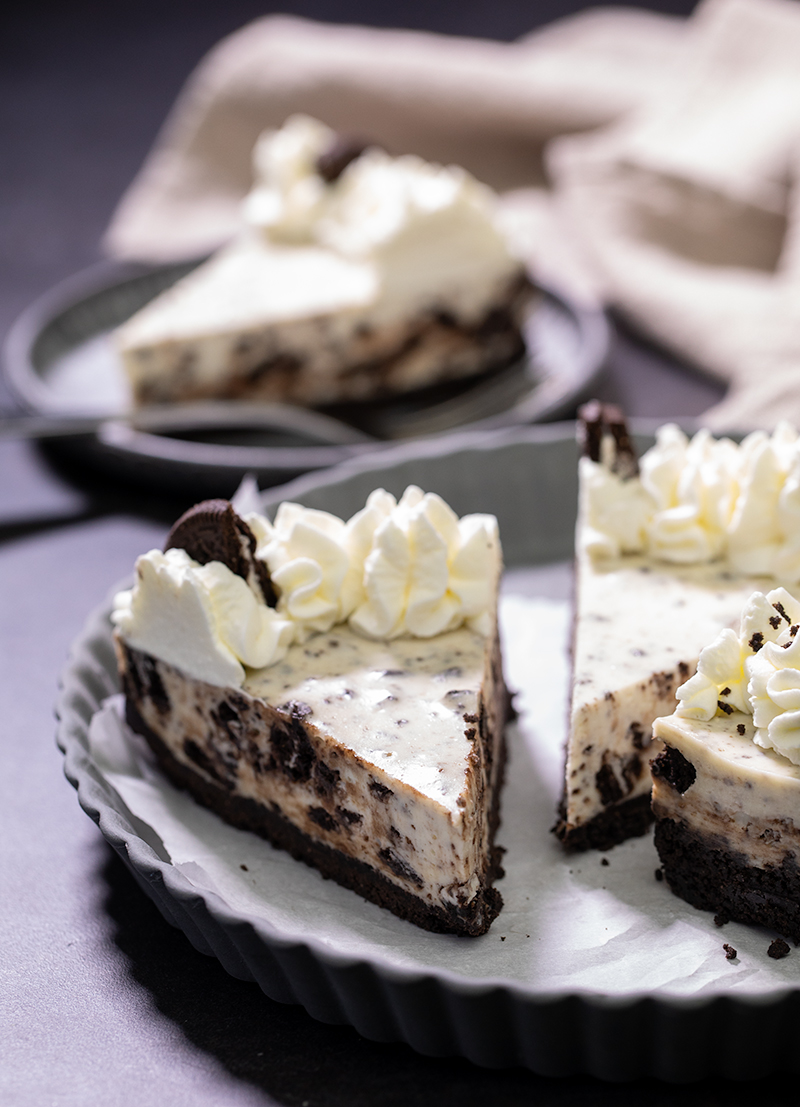
This creamy, rich no bake Oreo cheesecake has chocolate Oreo cookies in the crust and filling, and it sets perfectly and slices cleanly!
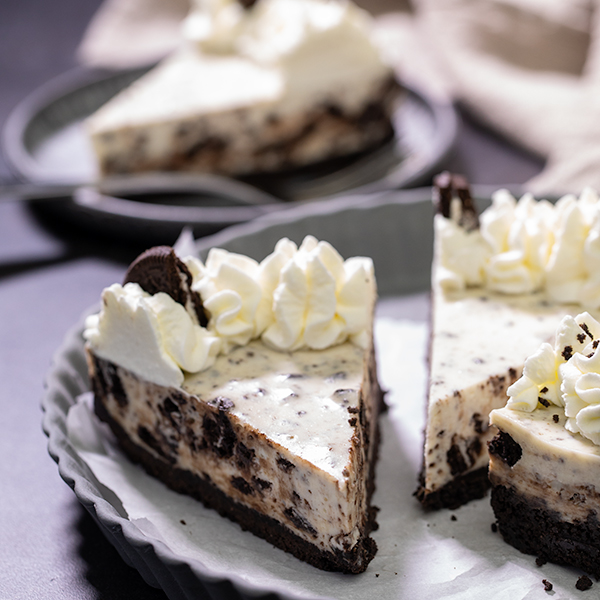
Leave the oven off for this no bake Oreo cheesecake recipe! It’s still rich, creamy and satisfying, with Oreo crumbs in the cookie crust and lots of crushed Oreos in the filling.
Why I love this no bake Oreo cheesecake recipe
- No fancy ingredients: The main ingredients in no bake cheesecake are cream cheese, sour cream, gelatin, and confectioners’ sugar. This filling just adds chopped Oreos to round out the flavors.
- Quick and easy: As long as your filling ingredients are at room temperature, all you really have to do is mix the gelatin with water, heat it in the microwave, then mix the rest of the filling ingredients together and let it set. Unlike a traditional cheesecake, it doesn’t have to cool, then set for so long in the refrigerator.
- It doesn’t deflate: No bake cheesecakes that are made of just cream cheese and whipped cream taste great—until they lose their shape as they sit. This cheesecake holds it shape for days and even weeks.
- No oven: There’s no need to bake this like a traditional cheesecake, which calls for eggs and special treatment so it doesn’t crack in the oven.
Ingredient notes
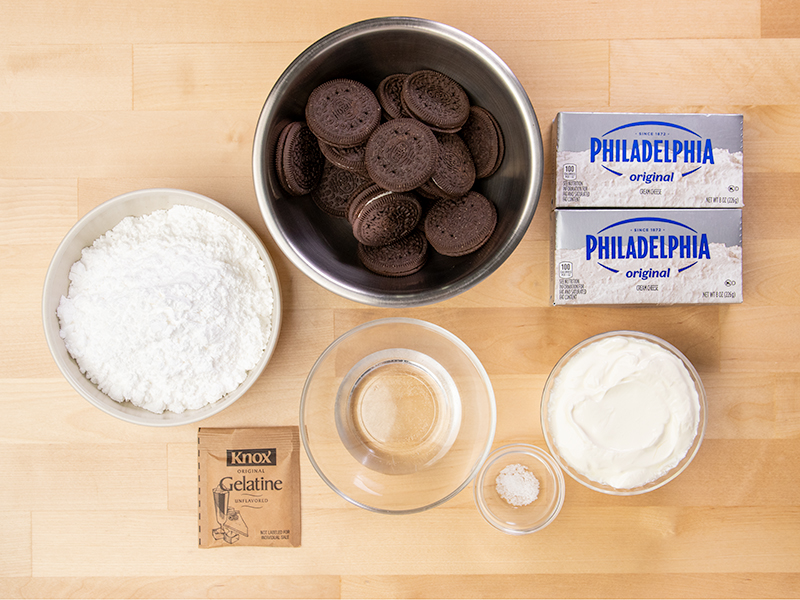
- Cream cheese: Make sure you use the full fat block-style cream cheese. I’m partial to Philadelphia brand because it always tastes great. It should be room temperature or it won’t blend smoothly.
- Sour cream: Adds a pleasant tang and makes for a smooth textured cheesecake.
- Gelatin: Unflavored powdered gelatin, bloomed in water and melted, makes the cheesecake set so it slices cleanly.
- Salt: A touch of kosher salt is easy to avoid overmeasuring, balances the sweetness, and brings out the other flavors.
- Confectioners’ sugar: Powdered sugar with some added starch adds sweetness and some structure to the cheesecake.
- Oreos: The star of the show, we break a whole bunch of Oreo chocolate sandwich cookies into irregular pieces and mix them into the cheesecake for flavor and texture. We also remove the fillings from more Oreo cookies and crush them into crumbs for the no bake cookie crust.
- Butter: Melted butter (not pictured here) added to the crushed chocolate wafer cookies from Oreos holds the cookie crumbs together and helps the crust set up in the refrigerator.
How to make no bake Oreo cheesecake
These step by step photos are meant to give you an idea of what it’s like to make this recipe in your own home. For full instructions including precise ingredient amounts and a printable recipe, please scroll down to the recipe card at the bottom of the page.
Make the no bake Oreo cookie crust.
I like to remove the filling from the Oreo cookies before grinding them into crumbs in my mini food processor. Then, add melted butter and mix, pour into a springform pan, and press down the crust firmly before chilling it.
Make the cheesecake filling.
“Bloom” 1 packet of gelatin in water, then heat in the microwave briefly to liquefy. Beat room temperature cream cheese and sour cream until smooth, then add salt and sifted confectioners’ sugar. The filling will be relatively thin.
Add Oreo pieces & finish filling.
Crush about 18 Oreo cookies (with the cream filling) with a rolling pin and fold the crushed cookies into the filling. Pour the filling into a springform pan, smooth the top, and chill for about 2 hours. It will firm up nicely.
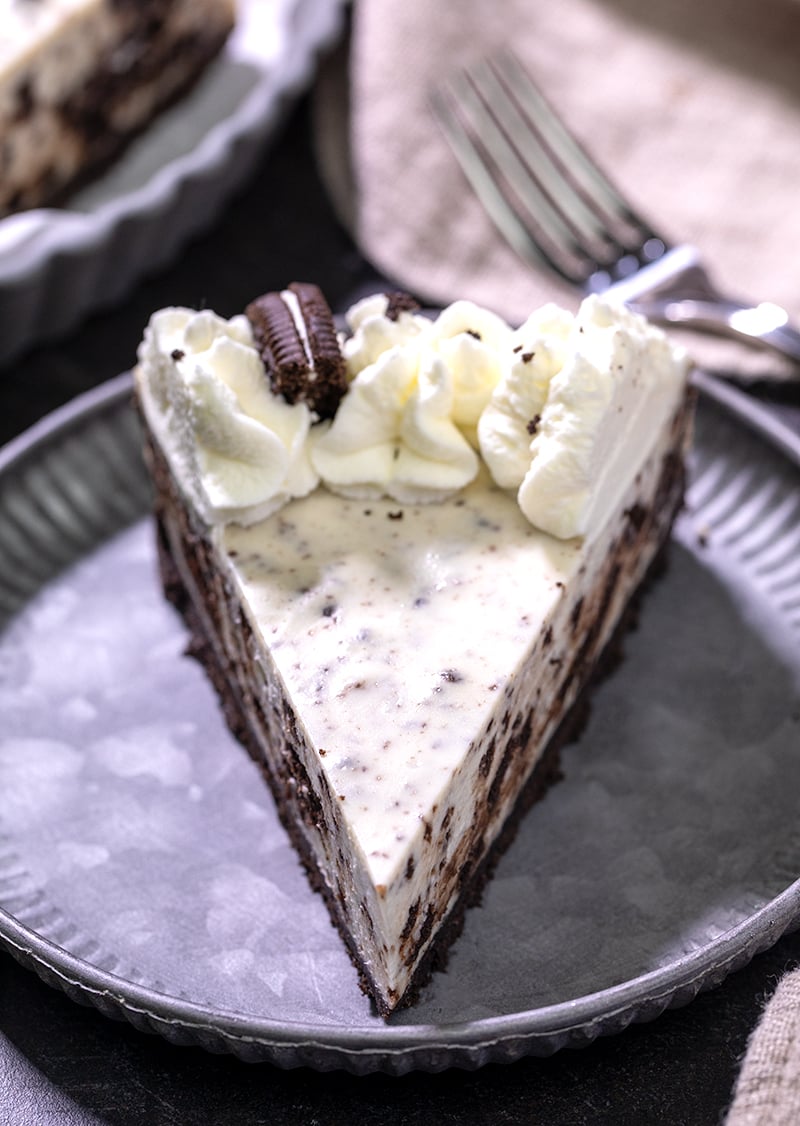
Let the cheesecake set, decorate, slice & serve.
For the cheesecake to fully set in the refrigerator takes about 2 hours, but you can refrigerate it for days, covered, if you’d like to make it in advance. Decorate with some more Oreos & some dollops of fresh whipped cream, and serve!

Tips for making the best no bake Oreo cheesecake
Use room temperature cream cheese & sour cream
If your cream cheese is cold, it will be lumpy. If your sour cream is cold, it will make the cream cheese clump.
Don’t use Double Stuf Oreos
There’s no reason to use Double Stuf Oreos for the crust, since we’re removing the creamy centers. And the extra cream cookie filling for the crushed cookies in the filling kind of disappears into the cheesecake filling. We want that rich chocolate Oreo cookie flavor and crunch.
How to store your Oreo cheesecake
Your cheesecake will keep in the refrigerator, covered, for at least a week. If you want to decorate with fresh whipped cream, only decorate the part of the cheesecake that you plan to serve that day.
To freeze: For longer storage, place the cheesecake in a tightly sealed, freezer-safe container for up to 2 months. Defrost at room temperature or in the refrigerator overnight. Decorate, if you’d like, before serving.
No bake Oreo cheesecake ingredient substitution suggestions
Gluten free no bake Oreo cheesecake
The only potential ingredient that could contain gluten is the Oreos, and I used gluten free Oreos, which are delicious and taste just like the “real” thing.
Can you make this recipe dairy free?
You would need a dairy free substitute for both the cream cheese and the sour cream. There are some good sour cream alternatives, like Tofutti “Better Than Sour Cream.” Dairy free cream cheese is a bit more difficult, since it can be hard to find one with a really authentic taste, but Miyoko’s Kitchen has the best flavor of any I’ve tried.
Frequently Asked Questions
Did you omit the gelatin in your filling? Maybe you didn’t bloom the gelatin in water and then heat it to liquefy it before adding it to the rest of the filling. There is enough gelatin in this cheesecake that it should be at least soft set even without refrigerating it.
Yes! You can freeze leftover slices by wrapping them tightly in freezer-safe plastic wrap and placing them in the freezer. They should stay relatively fresh for about 2 months. Defrost at room temperature or in the refrigerator overnight. Avoid freezing fresh whipped cream, though, if you can avoid it.
Yes, this cheesecake will keep its shape at room temperature because of the gelatin in the filling. Since there is a lot of dairy in the cheesecake, though, it’s best to store it in the refrigerator to avoid spoiling.
No, you can leave the filling in the Oreos to make the crust, but you’ll need about 5 tablespoons of melted butter instead of 7 tablespoons to hold it together. The cream filling in the Oreos will behave a bit like the butter.
Yes, you can use Double Stuf Oreos in the filling, but I wouldn’t use them in for the crust if you plan to leave the filling in the cookies. If you do crumble Double Stuf Oreos to mix into the filling, you will need fewer cookies to equal a total of 200 grams of cookies.
If you don’t want to use gelatin in the filling, you can try reducing the sour cream from 1 cup to 1/3 cup or 76 grams, increasing the confectioners’ sugar to 2 cups (230 grams), and adding 1 1/2 cups (12 fluid ounces) chilled heavy whipping cream. Make the filling as directed, beating the cream cheese and sour cream, then adding the sifted confectioners’ sugar. In a separate, medium-size bowl, beat the cream on medium speed with a handheld mixer or a stand mixer fitted with the whisk attachment until stiff (but not dry) peaks form. Add the whipped cream to the rest of the filling, and fold it in gently until the whipped cream is no longer easily visible. Add the crushed Oreo cookies, transfer the filling to the prepared crust, and chill for at least 6 hours and ideally overnight. You can even freeze the cheesecake for 2 hours first, then refrigerate for 6 hours for cleaner slices.
No Bake Oreo Cheesecake
This creamy, rich no bake Oreo cheesecake has chocolate Oreo cookies in the crust and filling, and it sets perfectly and slices cleanly!
Yield: 8 slices cheesecake
Prevent your screen from going dark
Ingredients
For the crust.
- 70 (300 g) Oreo chocolate cookie wafers wafers from 35 cookies, filling removed & discarded (gluten free, if necessary) (See Recipe Notes)
- 7 tablespoons (98 g) unsalted butter melted
For the filling.
- ¼ cup (2 fluid ounces) lukewarm water
- 1 packet (7 g) unflavored powdered gelatin (or 2 teaspoons if not using a packet)
- 2 8-ounce (16 ounces) packages cream cheese at room temperature
- 1 cup (227 g) sour cream at room temperature
- ⅛ teaspoon kosher salt
- 1 ½ cups (173 g) confectioners’ sugar sifted
- 18 (200 g) Oreo cookies (gluten free if necessary)
For decorating (optional)
- 5 Oreo cookies broken or cut into quarters (gluten free if necessary)
- Fresh whipped cream
Instructions
Make the crust.
-
In the bowl of a food processor fitted with the steel blade, place the Oreo cookies without the filling. Pulse until the Oreos are fine crumbs.
-
Place the cookie crumbs in a separate, medium-size bowl. Add the melted butter, and mix to combine, making sure all the cookie crumbs are moistened by the butter.
-
Press the mixture into the bottom and up the sides of a nonstick 9-inch springform pan. It can be useful to use a tart tamper or the bottom of a small glass to press the mixture firmly into the pan.
-
If you don’t have a springform pan, you can use a deep dish 9- or 10-inch pie plate, but grease it well.
-
Place the pan in the refrigerator to chill while you make the filling.
Make the filling.
-
In a small, heat-safe bowl, place the water and sprinkle the gelatin evenly on top. Mix to combine well, allow the mixture to sit for a few minutes until the gelatin swells.
-
Heat the mixture in the microwave at low power (about 50%) for about 30 seconds or until the mixture has just liquefied, but isn’t hot. Set the gelatin aside briefly.
-
In a large bowl with a handheld mixer or the bowl of a stand mixer with the paddle attachment, place the cream cheese and sour cream, and beat on medium-high speed until smooth and well-combined (about 2 minutes).
-
While still mixing on low speed, slowly pour in the gelatin mixture, and continue to mix until smooth. The mixture will seem relatively thin.
-
Add the salt and the (sifted) confectioners’ sugar and beat until smooth.
-
Place the Oreo cookies for the filling in a large ziptop bag. Hit the bag with a rolling pin or other blunt object to break the cookies into irregular pieces. Stop short of making the cookies into crumbs like for the crust.
-
Add the Oreo pieces to the bowl of filling, and fold them into the batter with a spatula so they’re evenly distributed.
-
Pour the mixture into the prepared crust. Using an offset spatula, spread the filling into an even layer.
Chill the cheesecake.
-
Cover the pan tightly with plastic wrap, making sure the plastic doesn’t touch the top of the cheesecake.
-
Place the covered pan in the refrigerator for at least 2 hours or until fully set. When the cheesecake is set, it will move only slightly when the pan is shaken from side to side.
-
Remove the pan from the refrigerator, remove the plastic, and free the filling from the sides of the pan by running a butter knife or offset spatula carefully all around the inside of the perimeter.
Serve.
-
Remove the sides of the pan, slice, and serve with more crushed or cut Oreos on top and some dollops of fresh whipped cream. Don’t add whipped cream to any slices that you think won’t be eaten the same day.
Notes
The crust calls for 300 grams total of Oreo wafers, without the filling, which requires 70 individual wafer cookies (from 35 cookie sandwiches). I twist open each cookie, remove the filling using a butter knife or offset spatula, and discard the filling. If you’d like to use the cookies for the crust without removing the center cream of each cookie, just reduce the melted butter to 5 tablespoons, from 7.
For the Oreos in the filling, I don’t remove the filling. Those are crushed using a rolling pin without removing the creamy center.
Nutritional information.
Nutrition information is per slice, assuming the whole cake, without optional decorations, is sliced into 8 equal portions. It is an estimate made using online calculators, provided as a courtesy, and is inherently unreliable.
Nutrition
Serving: 1slice | Calories: 761kcal | Carbohydrates: 119g | Protein: 8g | Fat: 41g | Saturated Fat: 17g | Polyunsaturated Fat: 5g | Monounsaturated Fat: 16g | Trans Fat: 0.5g | Cholesterol: 44mg | Sodium: 562mg | Potassium: 348mg | Fiber: 4g | Sugar: 55g | Vitamin A: 491IU | Vitamin C: 0.3mg | Calcium: 61mg | Iron: 16mg
Thanks for stopping by!
Hi, I’m Nicole. I create gluten free recipes that really work and taste as good as you remember. No more making separate meals when someone is GF, or buying packaged foods that aren’t good enough to justify the price. At Gluten Free on a Shoestring, “good, for gluten free” just isn’t good enough! Come visit my bio!