For the softest gluten free Japanese milk bread, begin with a simple cooked water roux of water and gf flour. It’s easier than you think, and you’ll be amazed at how tender, chewy, and delicious this gf bread is!

This super simple recipe for gluten free Japanese milk bread makes the softest recipe for batter-style gluten free bread you’ve ever seen, or tasted!
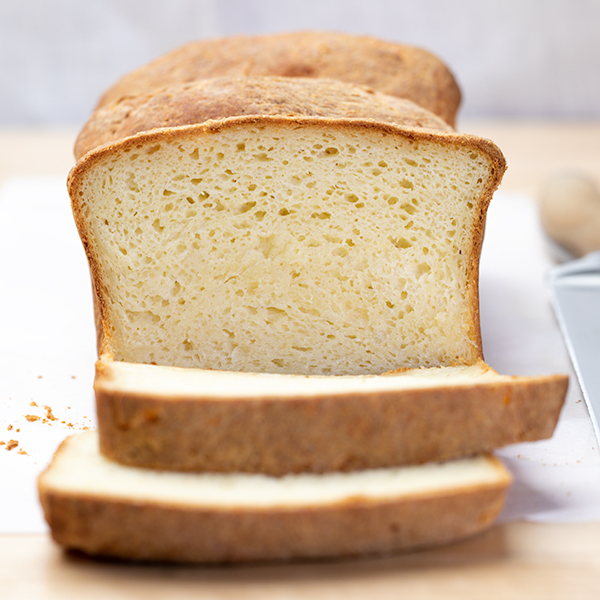
Imagine biting into a piece of bread that’s incredibly soft, tender, and fluffy, with a thin, crisp, yet chewy crust that leaves you craving for more. Welcome to the world of gluten free Japanese milk bread, a delightful culinary experience that will redefine your expectations of gluten free bread.
This amazing recipe combines a simple cooked gluten free flour and water mixture and batter-style bread to create an unbelievably soft and pillowy texture that will leave you in awe.
Say goodbye to the dry, crumbly gluten free breads of the past and hello to the softest, most delicious, stay-fresh gluten free bread you’ve ever tasted!
Why you’ll love this gluten free Japanese milk bread recipe
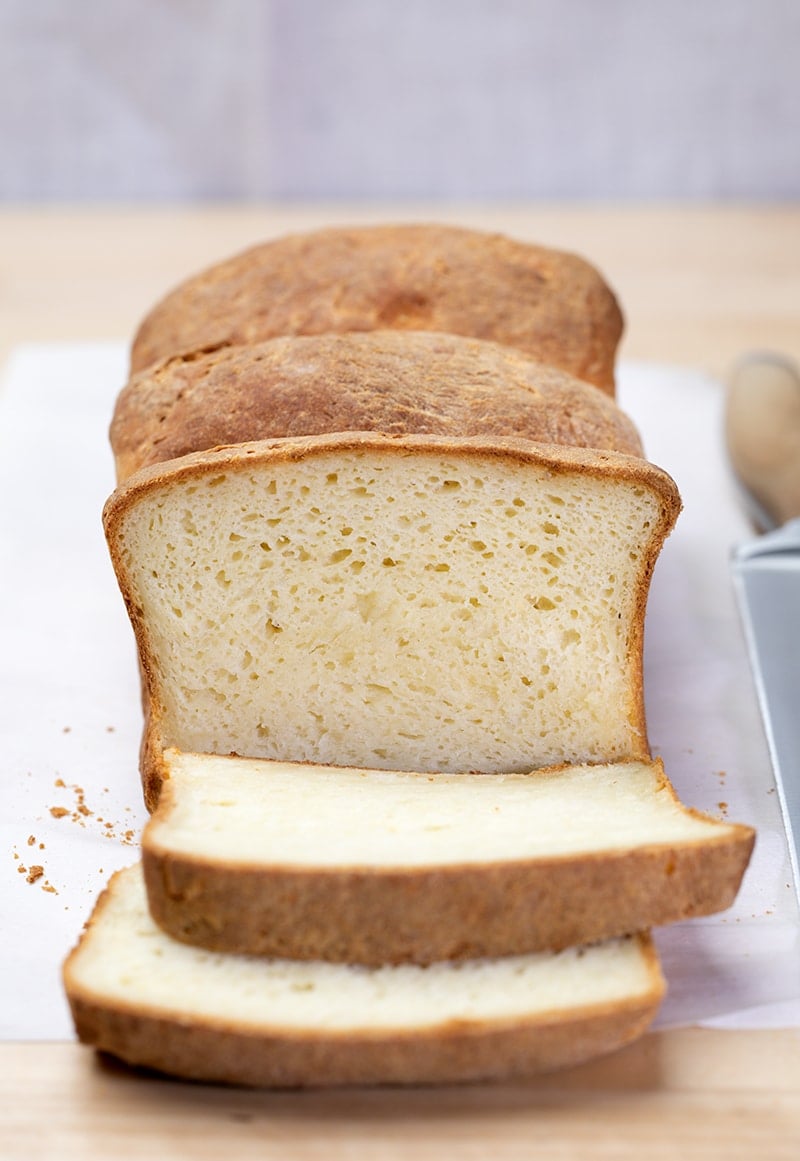
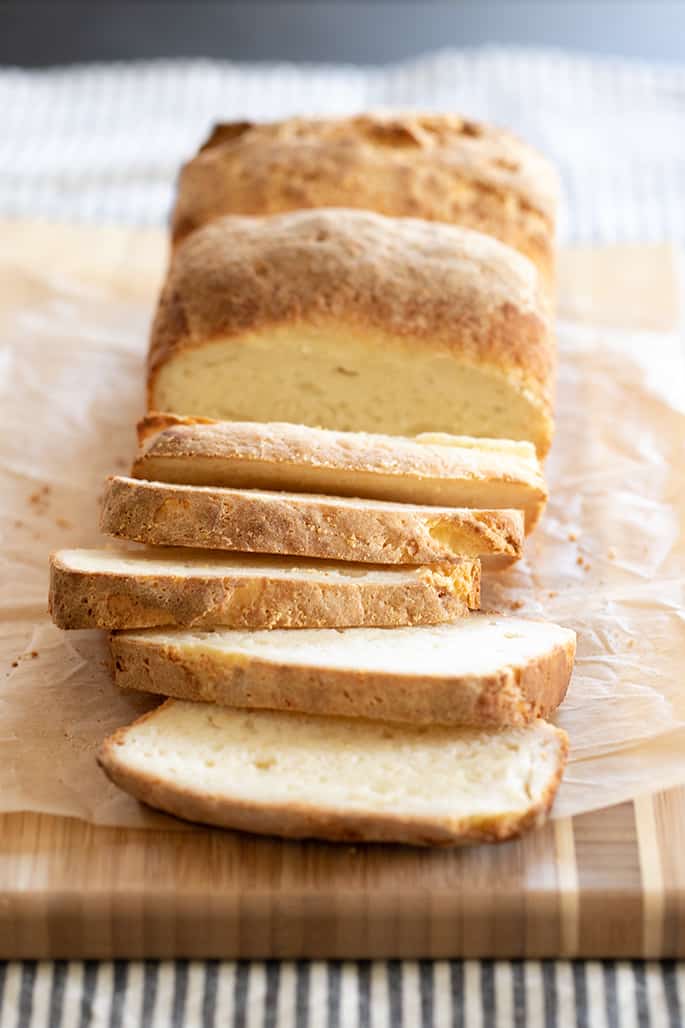
This loaf of bread is soft and tender without being super airy, like an English muffin bread. The crust is thin and crisp, but still tender and chewy.
It’s basically the softest bread you’ll ever eat—and it’s simple to make, too. The simple method we use for this gf bread locks in moisture without making the dough difficult to handle or resulting in a soggy bread.
If you’ve never heard of a Japanese “water roux,” it’s just a mixture of gluten free flour and water that’s briefly cooked on the stovetop until it thickens. It’s also known as tangzhong, which is designed to pre-gel the starches and help the bread stay fresher, longer.
A gluten free water roux is simple to make with just these 2 simple gluten free pantry ingredients, and you can even make it ahead of time. After making the roux, you’ll let it cool and then add it to the rest of the gf bread ingredients and make the softest gf bread of your life!
How to work with batter-style gluten free bread
I began making homemade gluten free bread way back in 2005, only my second year of baking gluten free at all. Those first breads were all in the “batter-style,” which simply means that the bread dough appears more like a cookie dough batter than what you would expect from yeast bread dough.
Since then, I’ve learned so much about gf yeast bread baking, much of which you can find in this post on how to make gluten free bread. Even though I’ve moved on to develop other methods, recipes like this gluten free Japanese milk bread and our old-style white gluten free bread still work beautifully—and have a special place in my kitchen (and my heart ❤️).
The raw bread dough itself in batter-style bread baking is wet and remains that way all the way through shaping since it doesn’t “stretch” when raw. Gluten free flours are typically water-loving, and the original successes in gluten free yeast bread baking called for adding more liquid to the bread to enable the yeast to thrive.
If any yeast bread dough is too dry or becomes that way during its rising time, the yeast will not thrive and the bread dough will not rise. My bread recipes made with gluten free bread flour have something different (whey protein isolate and Expandex modified tapioca starch) added to them.
Without that, all purpose gluten free flours will absorb tons of the water in the recipe and dry out the dough without more moisture. And that leads to an underwhelming (or completely absent) rise.
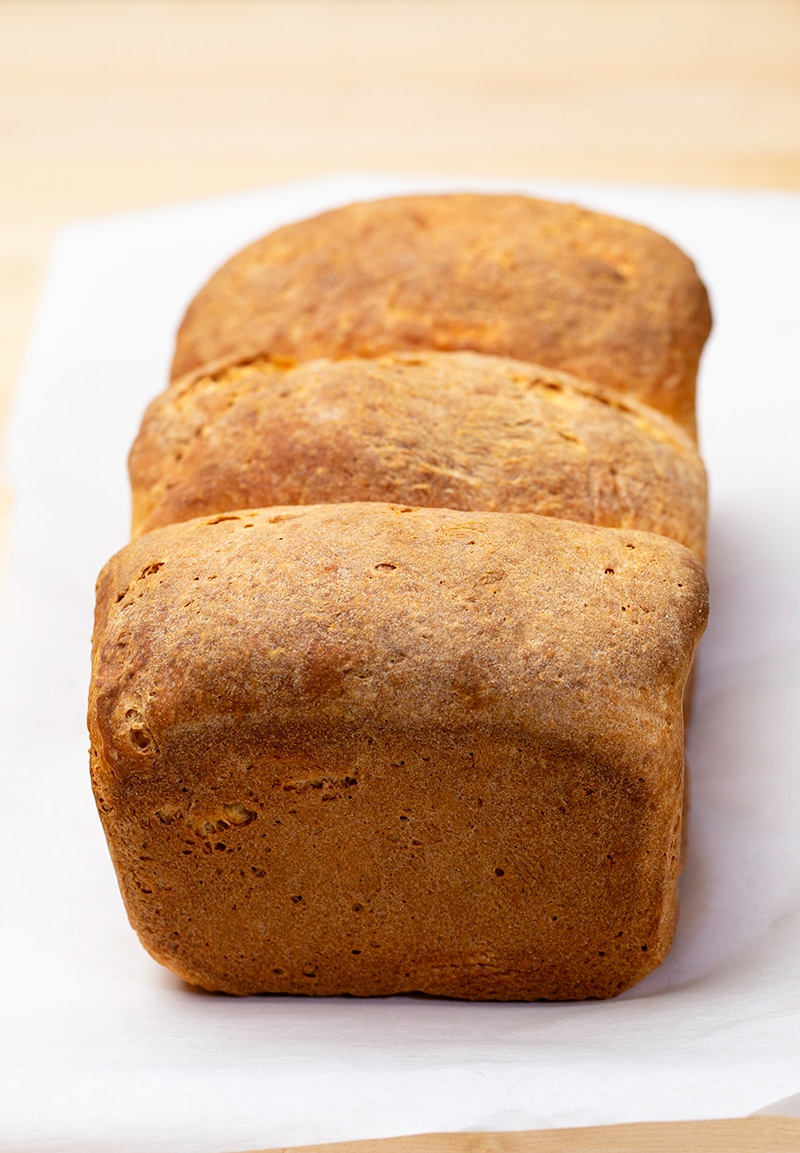
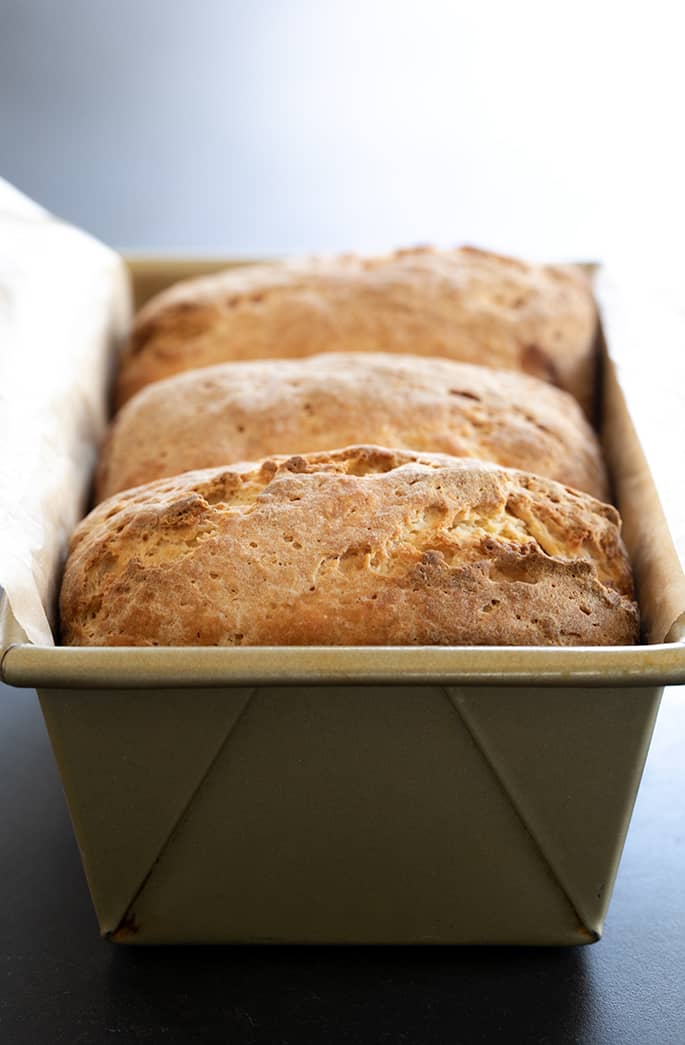
These batter-style bread recipes aren’t as easy to shape as conventional bread recipes, and the rise isn’t as smooth. That’s why you’ll see pockmarks in the bread both before and after baking.
But they require fewer unfamiliar ingredients as my newer recipes, and they are much easier to adapt to accommodate additional allergies (please scroll down to the Ingredients and substitutions section for more detail on that).
Baking gluten free isn’t quite as simple as switching conventional flour for gluten free.
How to handle this gluten free bread dough
Since this batter-style bread dough is quite wet and must stay that way, keep in mind that the dough will be tacky to the touch both before, during and after shaping. It also will not rise as smoothly as we might like, taking on something of a cratered appearance.
You can smooth out the dough after its rise, if you like, with wet fingers but don’t expect a tight rise. Even though the dough is wet, though, the moisture is still in balance with the other ingredients in the recipe. If you add too much moisture, the bread won’t ever bake all the way through to the center and you’ll end up with gummy spots.
You can sprinkle this dough very lightly with more flour as you’re shaping it, but use as little as you possibly can. Try flouring your fingers a bit, rather than the dough very often, and use a light touch so the dough stays wet.
Remember that you won’t be able to get the dough to be completely smooth on the outside since you’re not making conventional bread, so let go of that goal!
You’re using gluten free flour, not wheat bread flour, and you’re making gluten free milk bread, not yeasted wheat bread. Let go of your preconceptions of how to make yeast bread and enjoy this recipe just as it is!
What is a water roux and what does it do in this gluten free milk bread recipe
Our batter-style gluten free white sandwich bread develops a thick bakery-style crust on the outside. But this loaf of bread stays soft all the way through the end of its baking.
The water roux that you make at the start of the recipe helps lock in moisture. It’s just a simple cooked mixture of gluten free flour and water.
The water roux can be made days ahead of time (and even doubled, then divided for each loaf), and stored in a sealed container in the refrigerator. That way, you can dump all the ingredients into your mixer whenever you’re ready to make some bread without having to engage in that extra step of making the roux.
Ingredients and substitutions for this gluten free Japanese milk bread recipe
How to make gluten free dairy free Japanese milk bread
This recipe contains dairy in the form of butter and milk, both of which are generally not that difficult to replace. Instead of cow’s milk, you can easily use unsweetened almond milk or coconut milk in the carton. Just be sure not to use anything nonfat (dairy or otherwise) since it has less richness and more additives.
Instead of the butter, try using Earth Balance buttery sticks in both the bread dough and for brushing the top of the bread. You might actually even be able to use a mild-tasting extra virgin olive oil in place of butter as well, but I haven’t tested any fats in this recipe that are liquid at room temperature.
Can you make this gluten free bread recipe without eggs?
Since there is only one egg in this recipe, you can try using a “chia egg” (1 tablespoon ground white chia seeds + 1 tablespoon lukewarm water, mixed and allowed to gel) in its place. Since this is a batter-style bread, you need a fair amount of help getting it to rise. Without the egg, even with an egg replacer, the bread will likely be denser.
Can you make this gluten free bread recipe without yeast?
No, you cannot make this yeasted bread without yeast as there is no proper substitute for bread-making yeast. Try my yeast free gluten free sandwich bread instead!
Replacing instant yeast with active dry yeast
If you only have active dry yeast, you can use that to replace instant yeast. Just use 25{5676e3b156b07d12bd9df9fe13d641a85da396026abde11a1ff2d0afc1b3c015} more yeast (here, that would be a total of 10 grams for one loaf). You’ll also have to hydrate the yeast in a few tablespoons of the recipe’s milk volume before adding it to the dough at the same time as the rest of the milk.

How to make super soft gluten free Japanese milk bread, step by step
Gluten Free Japanese Milk Bread
For the softest gluten free Japanese milk bread, begin with a simple cooked water roux of water and gf flour. It’s easier than you think, and you’ll be amazed at how tender, chewy, and delicious this gf bread is!
Yield: 12 slices bread
Prevent your screen from going dark
Ingredients
For the gf bread dough
- 3 cups (420 g) all purpose gluten free flour blend (I used Better Batter), plus more for sprinkling
- 1 ½ teaspoons xanthan gum omit if your blend already contains it
- ¼ teaspoon cream of tartar
- ¼ cup (50 g) granulated sugar
- 2 ½ teaspoons (8 g) instant yeast (also called rapid-rise or breadmaker yeast)
- ½ teaspoon kosher salt
- 1 teaspoon apple cider vinegar
- 1 (50 g (weighed out of shell)) egg at room temperature
- 1 ¼ cups (10 fluid ounces) warm milk (about 100°F)
- 4 tablespoons (56 g) unsalted butter melted and cooled
- Water roux at room temperature
- Melted butter for brushing (optional)
Instructions
First, make the water roux.
-
In a small saucepan, place the roux ingredients and whisk to combine well. Cook the roux over medium-high heat, whisking constantly, until thickened enough that the whisk leaves a visible trail.
-
Remove it from the heat immediately and allow to cool to at least warm room temperature. The roux can be made ahead of time and stored in a sealed container in the refrigerator. Just allow it to come to room temperature before baking with it.
Make the bread dough.
-
Grease and line a standard 9-inch x 5-inch loaf pan and set it aside.
-
In the bowl of a stand mixer fitted with the paddle attachment, place 3 cups of the flour, xanthan gum, cream of tartar, sugar and yeast, and whisk with a separate handheld whisk to combine well. Add the kosher salt, and whisk once again to combine.
-
Add the vinegar, egg, milk, butter, and water roux, and mix well on low speed. Once the dry ingredients have been incorporated into the wet ingredients, turn the mixer up to high speed and allow to mix for about 3 minutes. The dough should be shaggy and tacky to the touch.
-
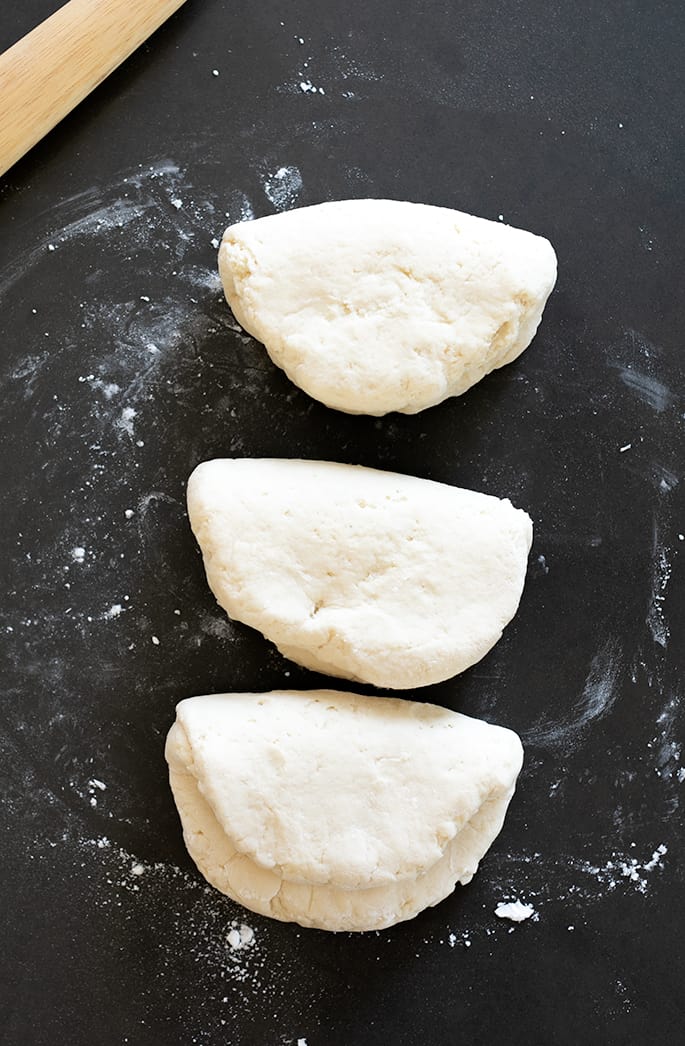
Turn the dough out onto a very lightly floured surface, and divide into 3 equal portions (each about 350 grams). Work with one piece of dough at a time.
-
Pat out the first piece of dough into a flat disk about 3/4-inch thick. Fold the disk loosely in half from one short end to the other. Repeat with the remaining pieces of dough.
-
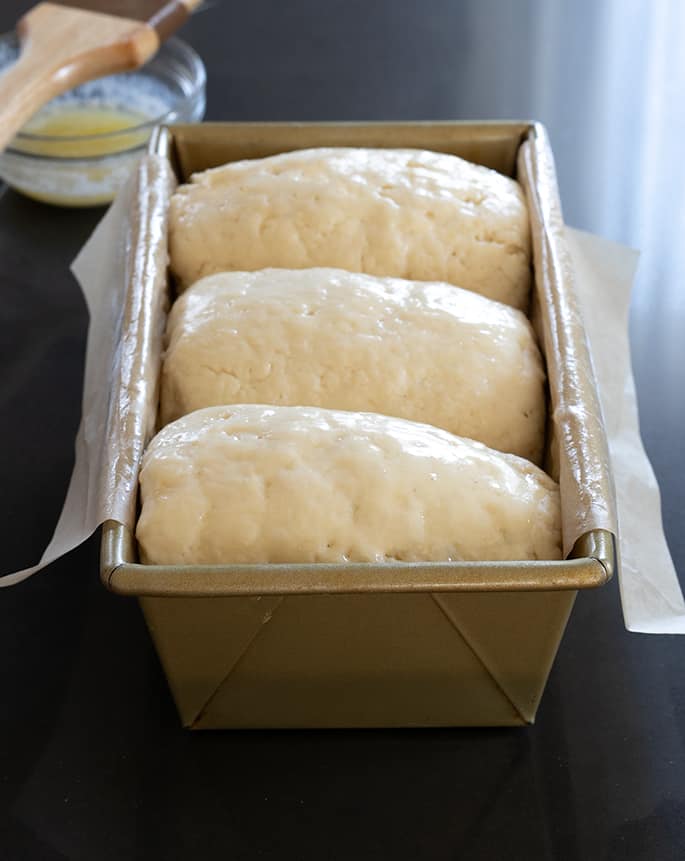
Stack the folded pieces of dough one behind the other, the rounded (folded) part facing up. The shaped pieces of dough should fit snugly in the pan from end to end, and will rise up, not out.
-
Spray the dough lightly with warm water, and cover the pan loosely with plastic wrap. Place in a warm, draft-free location to rise until it has reached about 150{5676e3b156b07d12bd9df9fe13d641a85da396026abde11a1ff2d0afc1b3c015} of its original volume.
-
While the dough is rising, preheat your oven to 350°F.
-
Once the dough has finished rising, remove the plastic wrap, brush lightly with the optional melted butter, and place in the center of the preheated oven. Bake for 45 minutes.
-
Remove the bread from the loaf pan and transfer to a rimmed baking sheet. Return the bread on the baking sheet to the oven.
-
Continue to bake until the loaf sounds hollow when thumped on the side and reads about 190°F when an instant-read thermometer is inserted in the center of the loaf and is lightly golden brown all over (about another 10 minutes). Remove the loaf from the oven and transfer it to a wire rack to cool completely before slicing and serving.

Gluten Free Japanese Milk Bread
For the softest gluten free Japanese milk bread, begin with a simple cooked water roux of water and gf flour. It’s easier than you think, and you’ll be amazed at how tender, chewy, and delicious this gf bread is!
Yield: 12 slices bread
Prevent your screen from going dark
Ingredients
For the gf bread dough
- 3 cups (420 g) all purpose gluten free flour blend (I used Better Batter), plus more for sprinkling
- 1 ½ teaspoons xanthan gum omit if your blend already contains it
- ¼ teaspoon cream of tartar
- ¼ cup (50 g) granulated sugar
- 2 ½ teaspoons (8 g) instant yeast (also called rapid-rise or breadmaker yeast)
- ½ teaspoon kosher salt
- 1 teaspoon apple cider vinegar
- 1 (50 g (weighed out of shell)) egg at room temperature
- 1 ¼ cups (10 fluid ounces) warm milk (about 100°F)
- 4 tablespoons (56 g) unsalted butter melted and cooled
- Water roux at room temperature
- Melted butter for brushing (optional)
Instructions
First, make the water roux.
-
In a small saucepan, place the roux ingredients and whisk to combine well. Cook the roux over medium-high heat, whisking constantly, until thickened enough that the whisk leaves a visible trail.
-
Remove it from the heat immediately and allow to cool to at least warm room temperature. The roux can be made ahead of time and stored in a sealed container in the refrigerator. Just allow it to come to room temperature before baking with it.
Make the bread dough.
-
Grease and line a standard 9-inch x 5-inch loaf pan and set it aside.
-
In the bowl of a stand mixer fitted with the paddle attachment, place 3 cups of the flour, xanthan gum, cream of tartar, sugar and yeast, and whisk with a separate handheld whisk to combine well. Add the kosher salt, and whisk once again to combine.
-
Add the vinegar, egg, milk, butter, and water roux, and mix well on low speed. Once the dry ingredients have been incorporated into the wet ingredients, turn the mixer up to high speed and allow to mix for about 3 minutes. The dough should be shaggy and tacky to the touch.
-
Turn the dough out onto a very lightly floured surface, and divide into 3 equal portions (each about 350 grams). Work with one piece of dough at a time.
-
Pat out the first piece of dough into a flat disk about 3/4-inch thick. Fold the disk loosely in half from one short end to the other. Repeat with the remaining pieces of dough.
-
Stack the folded pieces of dough one behind the other, the rounded (folded) part facing up. The shaped pieces of dough should fit snugly in the pan from end to end, and will rise up, not out.
-
Spray the dough lightly with warm water, and cover the pan loosely with plastic wrap. Place in a warm, draft-free location to rise until it has reached about 150{5676e3b156b07d12bd9df9fe13d641a85da396026abde11a1ff2d0afc1b3c015} of its original volume.
-
While the dough is rising, preheat your oven to 350°F.
-
Once the dough has finished rising, remove the plastic wrap, brush lightly with the optional melted butter, and place in the center of the preheated oven. Bake for 45 minutes.
-
Remove the bread from the loaf pan and transfer to a rimmed baking sheet. Return the bread on the baking sheet to the oven.
-
Continue to bake until the loaf sounds hollow when thumped on the side and reads about 190°F when an instant-read thermometer is inserted in the center of the loaf and is lightly golden brown all over (about another 10 minutes). Remove the loaf from the oven and transfer it to a wire rack to cool completely before slicing and serving.