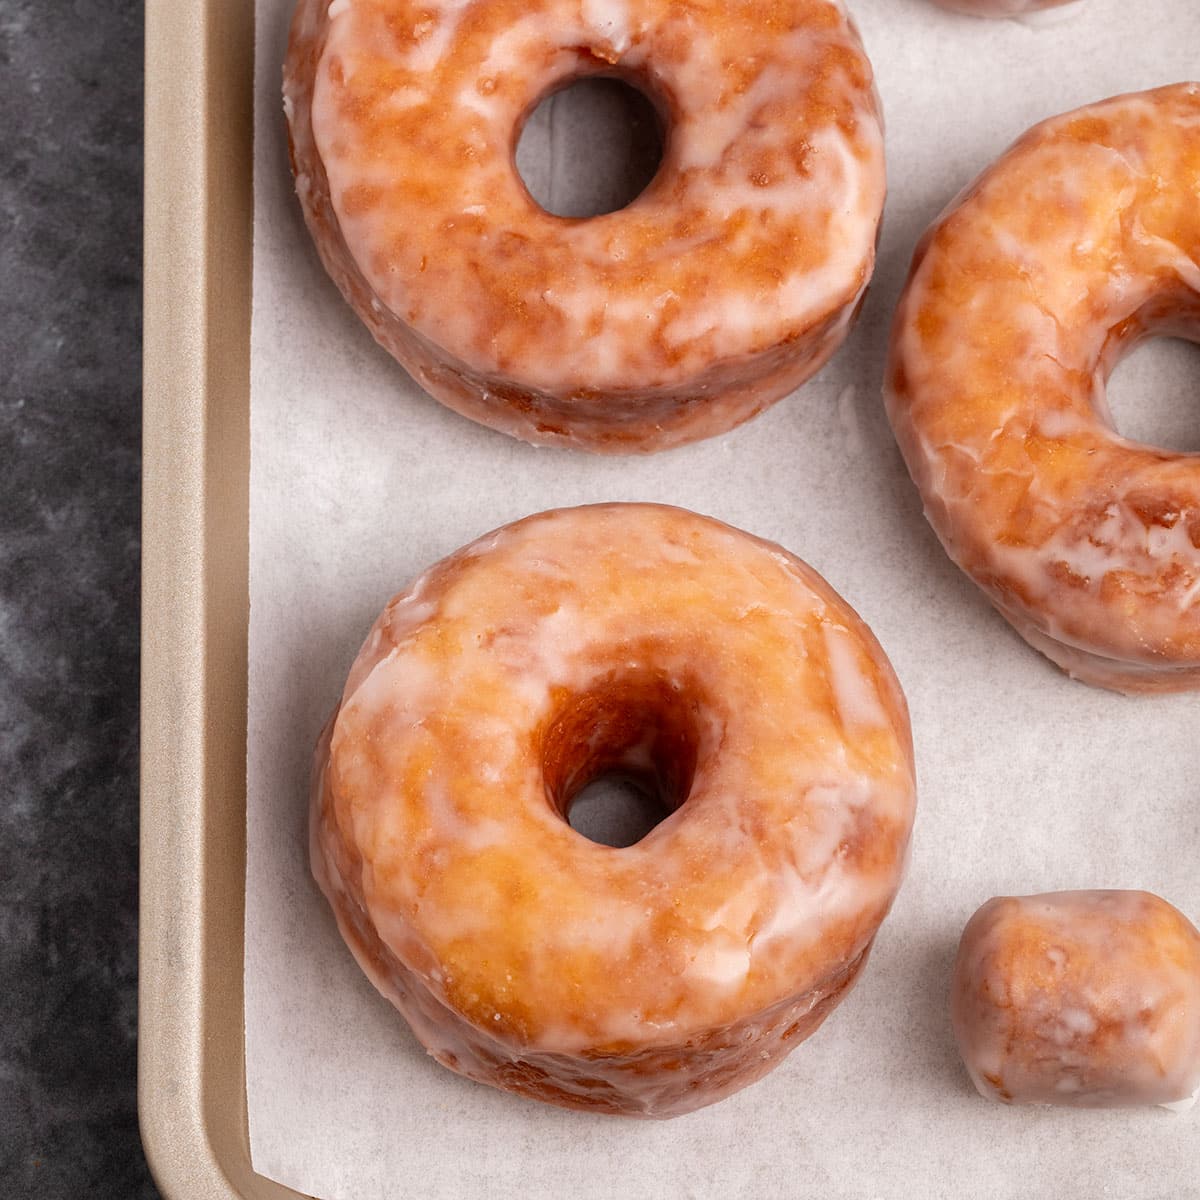
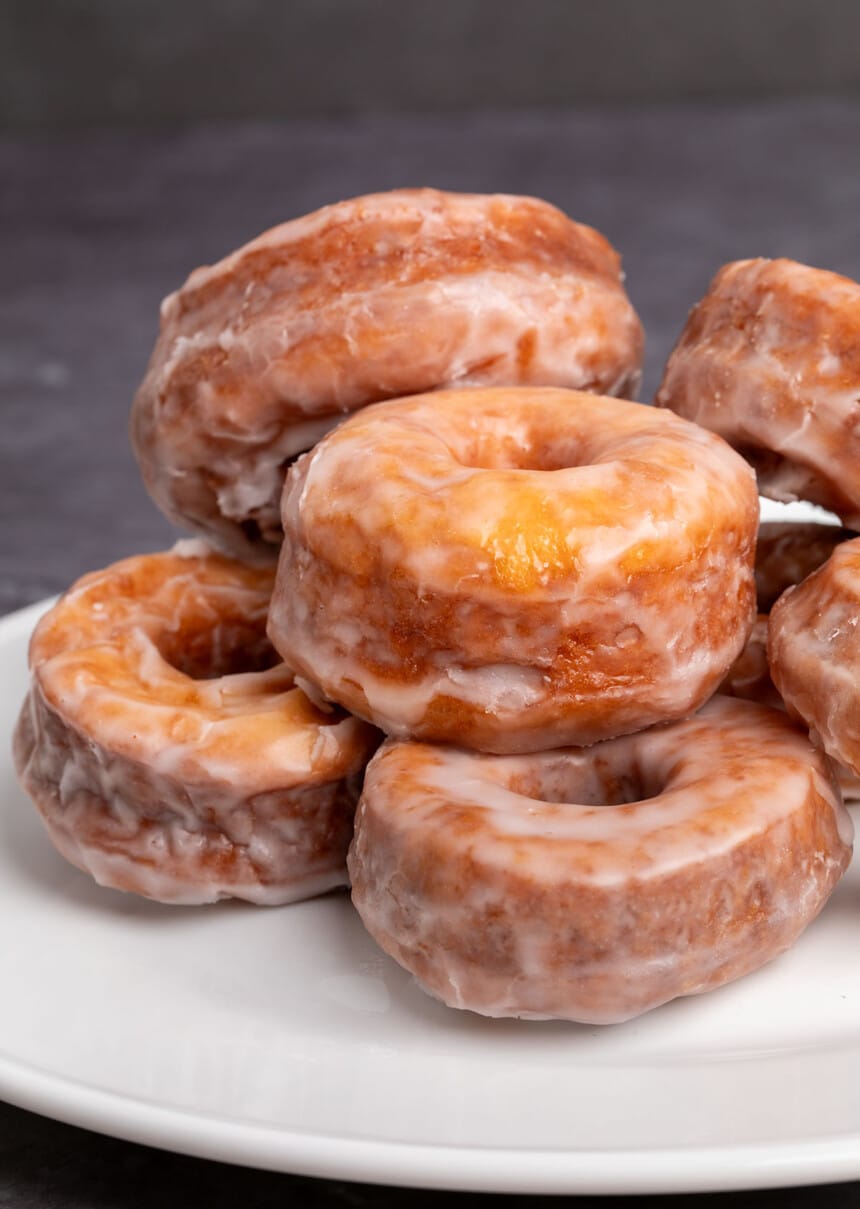
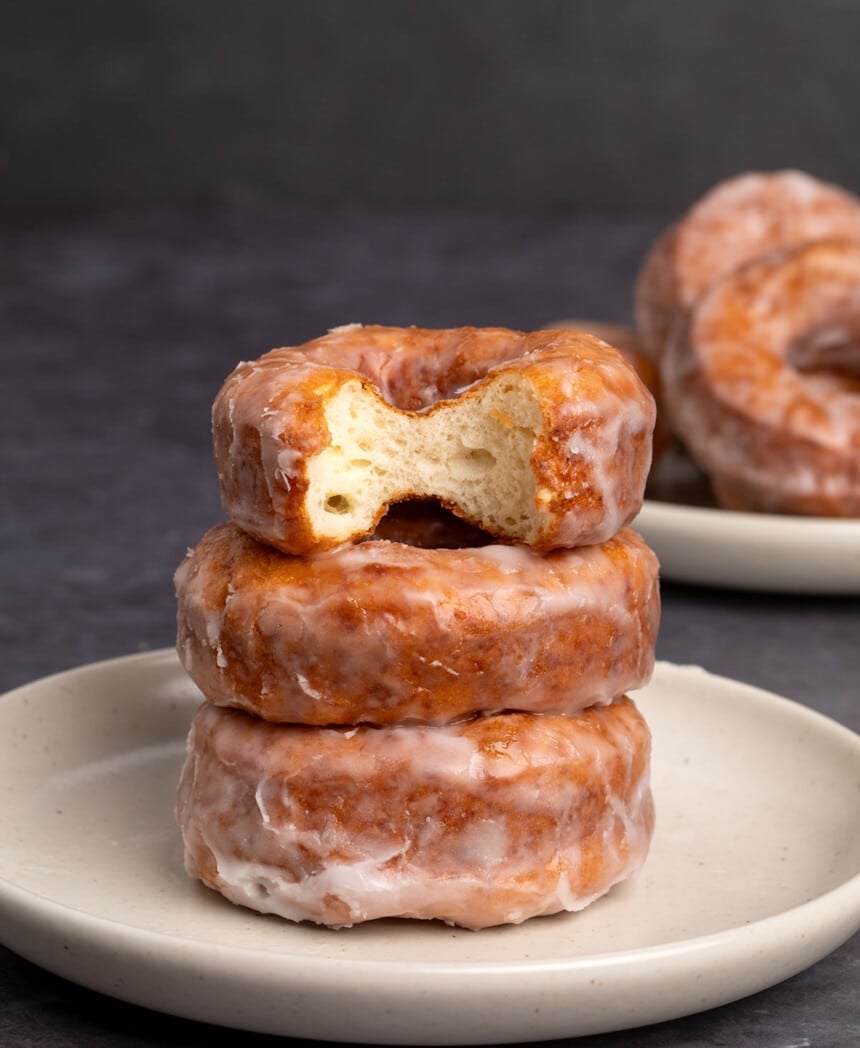
These yeast-raised, gluten free donuts are so soft and fluffy inside, golden brown outside, and taste just like Krispy Kreme!
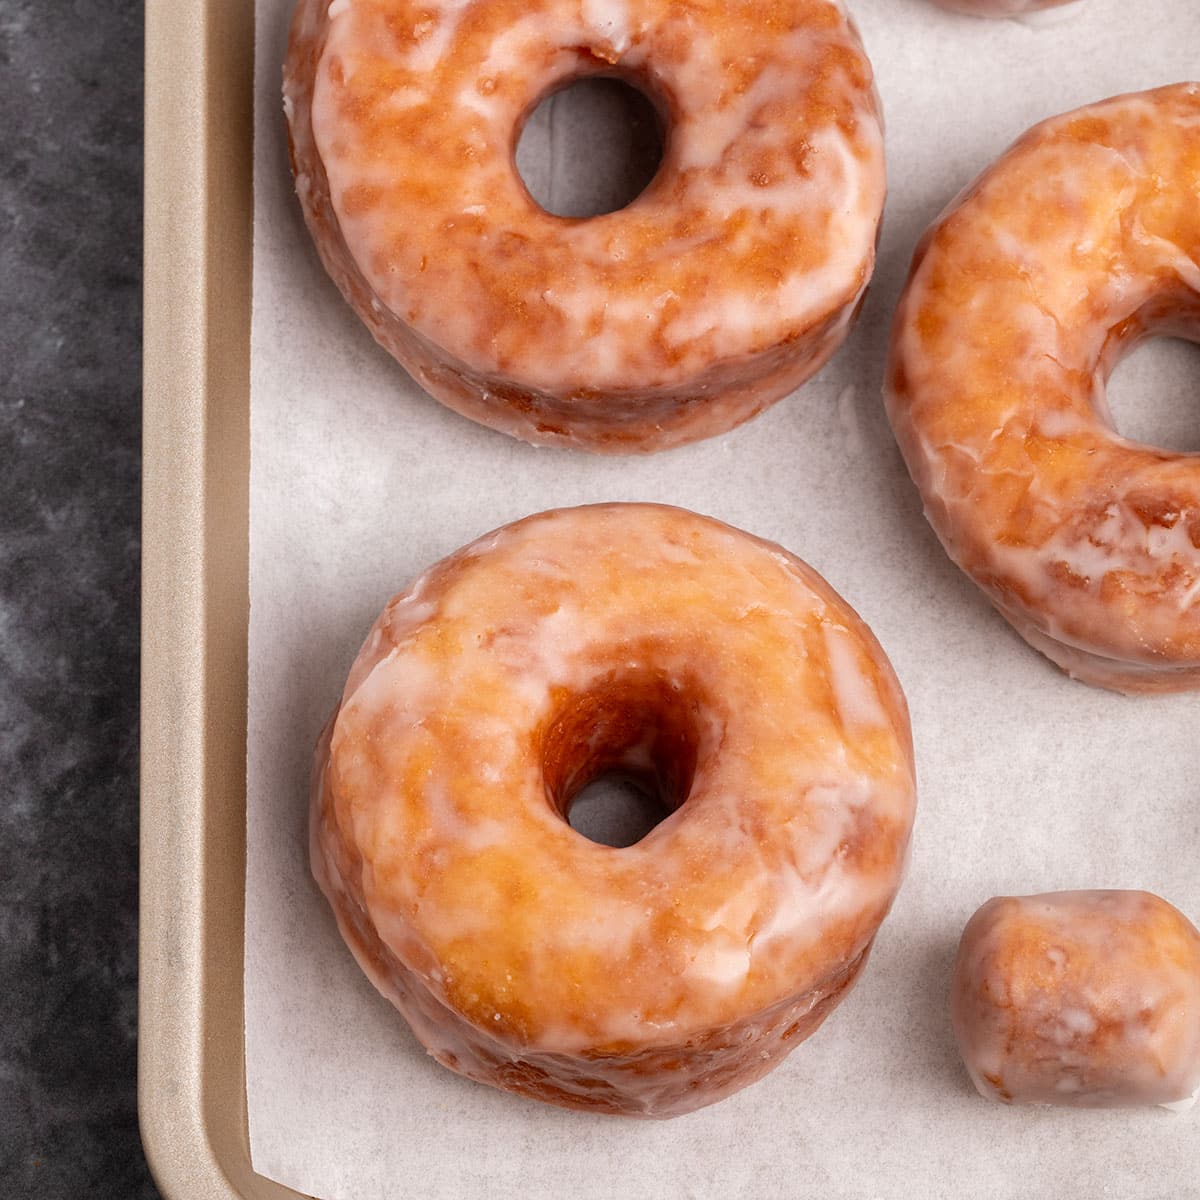
These light and airy glazed yeast-raised gluten free donuts taste like they’re from your favorite bakery from way back when. Now, you can fry them in oil, or make them in your Air Fryer with almost no oil. Either way, don’t forget the glaze!
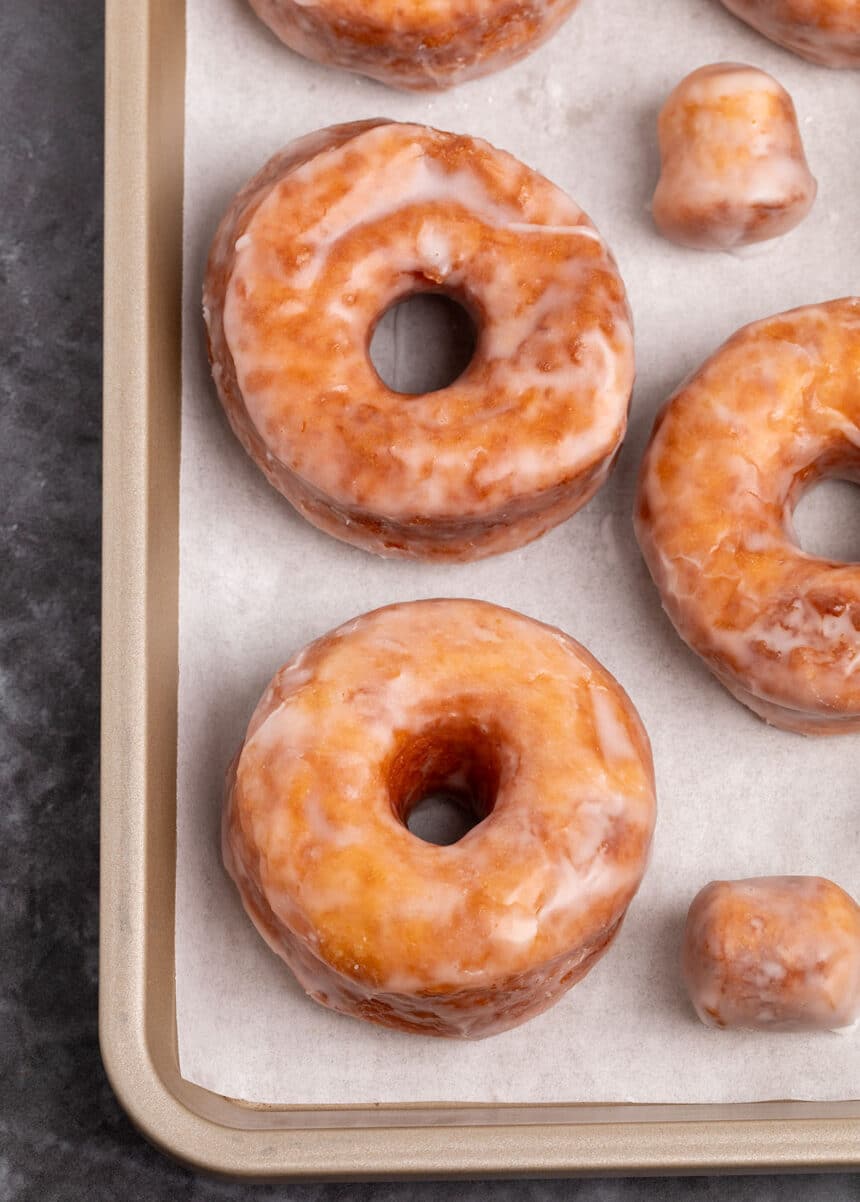
Why this is the best yeasted gluten free donut recipe
Don’t get me wrong: cake donuts are quite nice. But when you’re craving a fluffy donut, the cake variety isn’t going to do it for you.
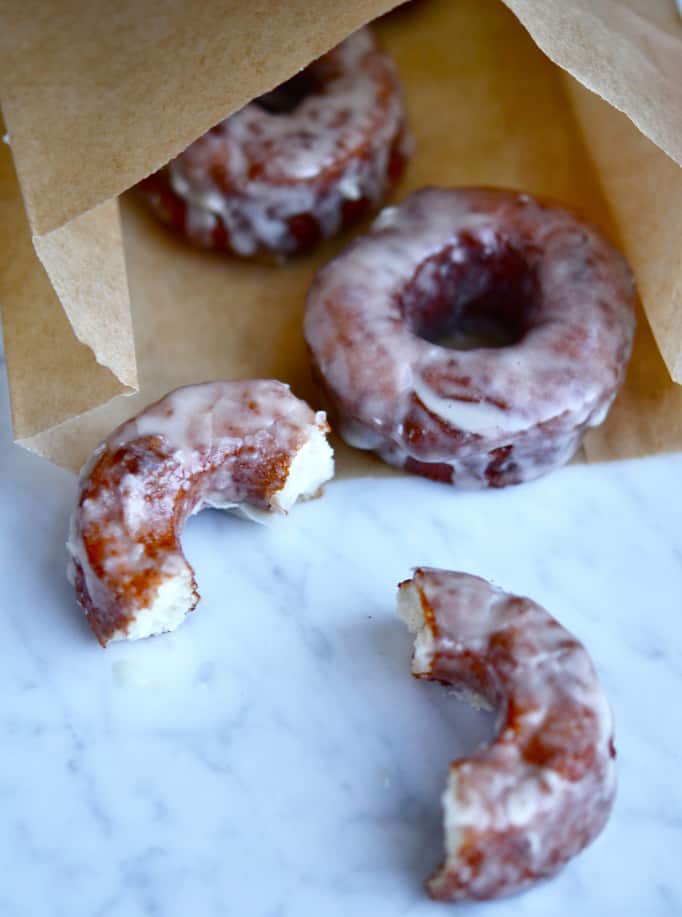
This fried donut recipe is what I imagine a Krispy Kreme gluten free doughnut would taste like, if there was such a thing. These homemade donuts are golden brown and slightly crispy on the outside and soft, rich, and fluffy on the inside — just like Krispy Kreme donuts!
What’s especially nice about this gluten free doughnuts recipe is that there’s room for variation. Love to deep fry? We’ve got your covered. Prefer to air fry? We’ve got instructions for that too.
What if plain glazed doughnuts are not quite your thing? That’s okay — you don’t have to hunt down other gluten free donut recipes. With these fried morsels, you can make a jelly donut, a powdered sugar donut, donut holes, and more.
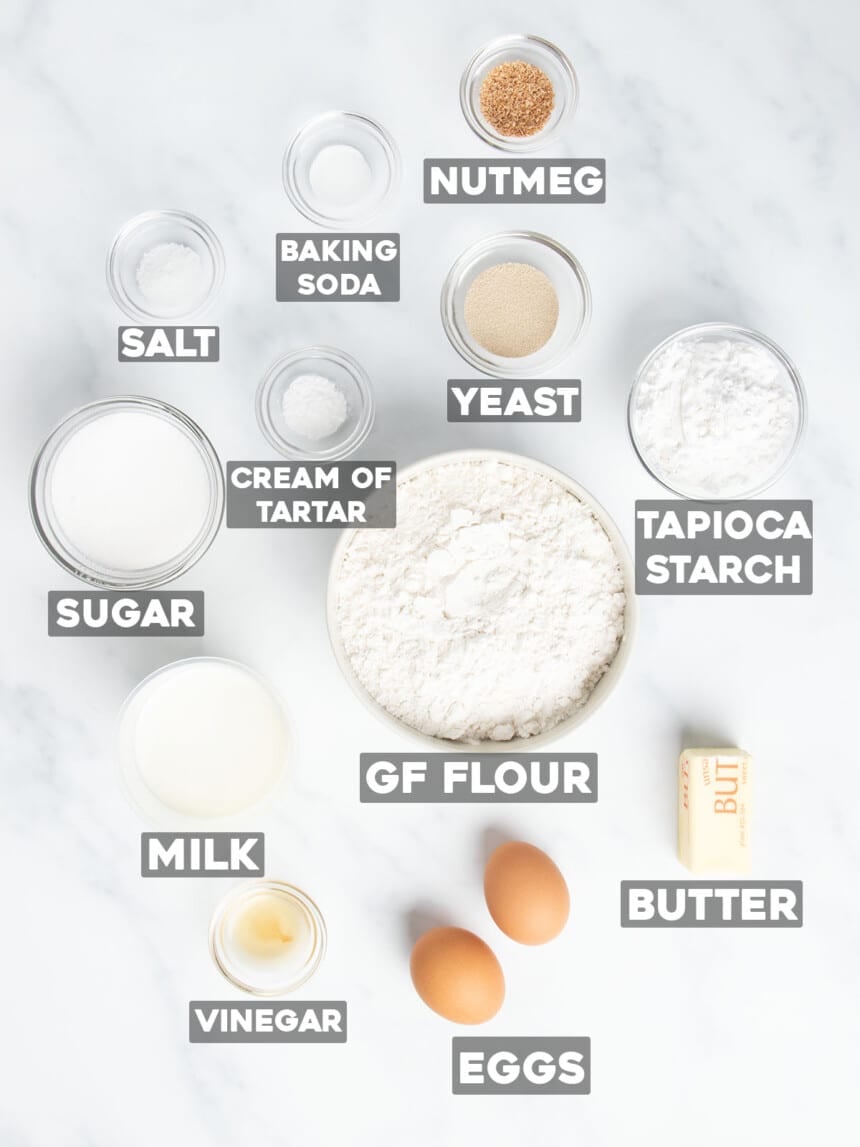
Ingredients for Yeasted Donuts
- Gluten free flour blend – my go-to gluten free flour blend is Better Batter. If you use a different gf flour, I can’t guarantee that you’ll get the same results as me, especially with yeast breads. As always, click through to our all purpose gluten free blends page for full info on this super important topic.
- Tapioca starch/flour – replacing some of the all purpose flour with additional tapioca starch gives the donuts more elasticity, makes the dough a bit easier to handle, and helps make the donuts fluffier and more tender. Even if your all purpose blend contains tapioca starch, you still must add this ingredient.
- Salt – salt brings out and ties together all the other flavors in these donuts; it also helps keep the yeast from overproofing the dough.
- Cream of tartar and baking soda – when these ingredients combine, they create a reaction that helps these gluten free yeast donuts puff up and help them brown
- Sugar – sugar makes the donuts sweet and tender
- Instant yeast – I use instant yeast to make my gluten free yeast donuts, but you can also use dry active yeast if you use 25% more, by weight, and soak it in some of the milk first before combining with the rest of the ingredients.
- Apple cider vinegar – helps make the rise more stable and adds flavor.
- Eggs – an egg and an egg white help bind the donut dough together, and helps the rise.
- Milk – warm milk adds moisture and richness
- Melted butter – butter adds tenderness and flavor
- Oil – use vegetable oil or another neutral oil with a high smoke point to fry your donuts
How to make this gluten free donuts recipe
Make the raw dough & let it rise
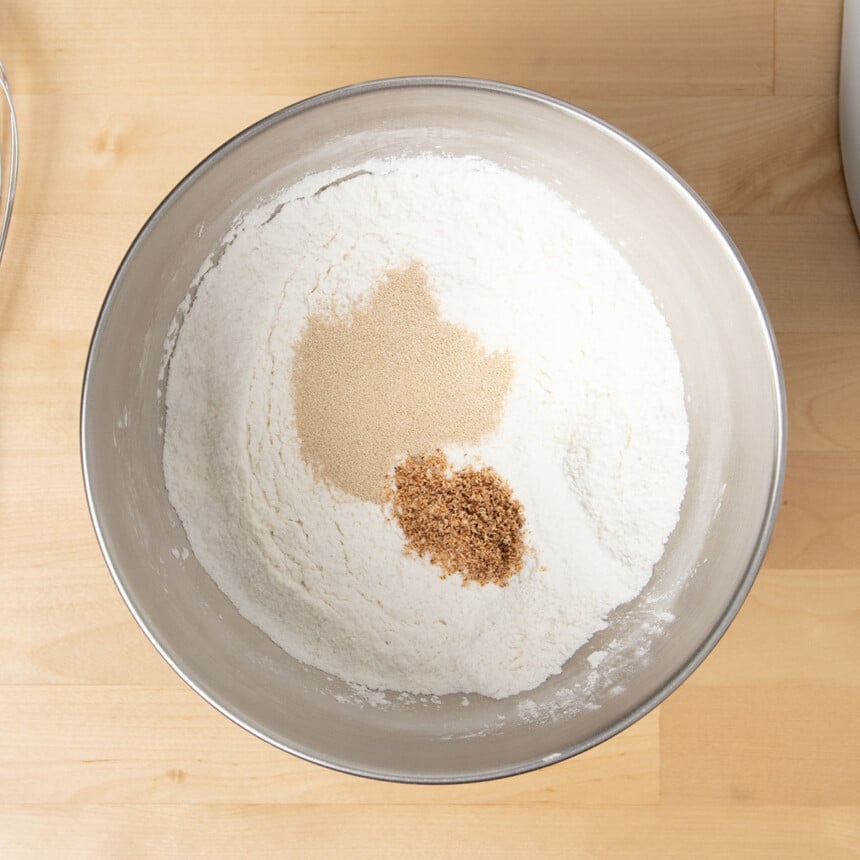
- Whisk together all the dry ingredients (yeast and nutmeg last)
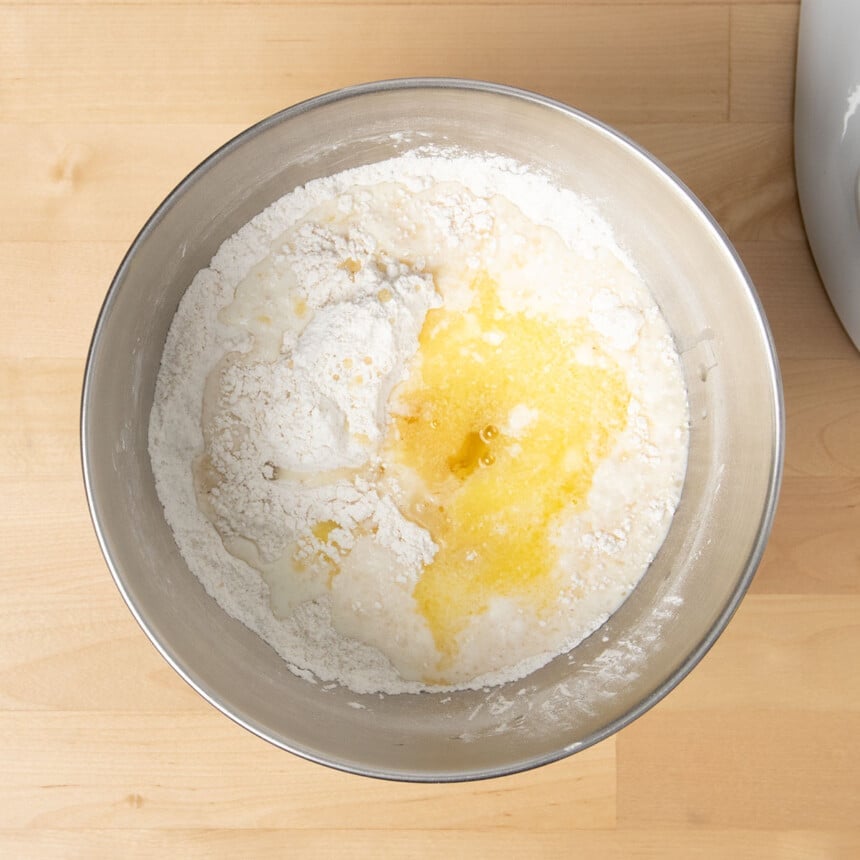
- Add the wet ingredients (vinegar, eggs, milk, melted butter)
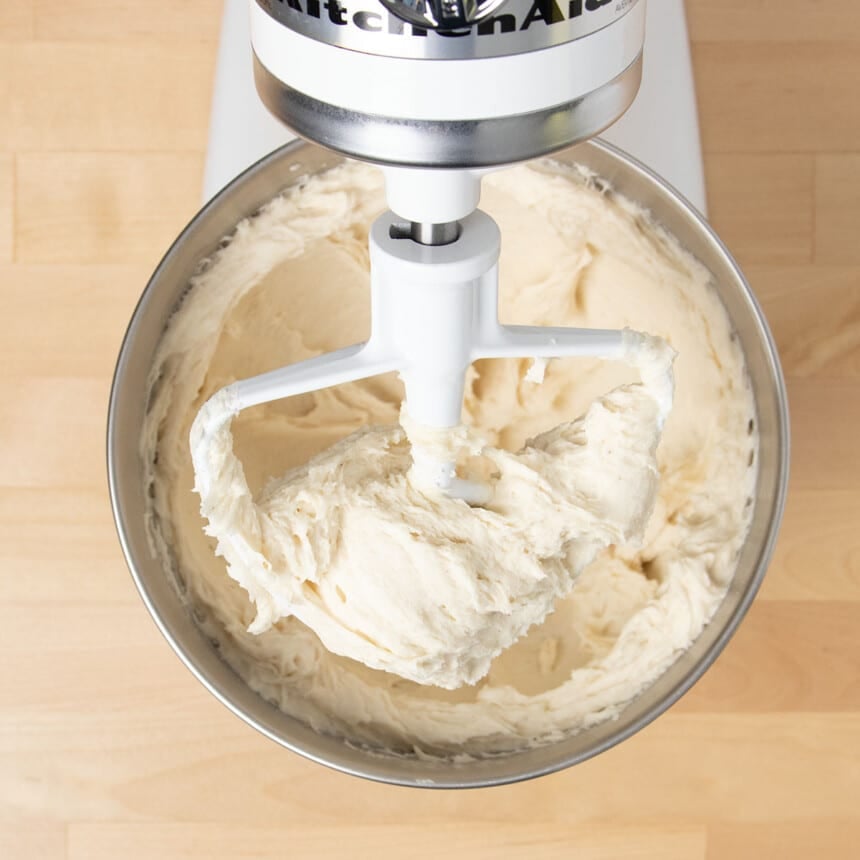
- Beat the ingredients very well to form a wet dough
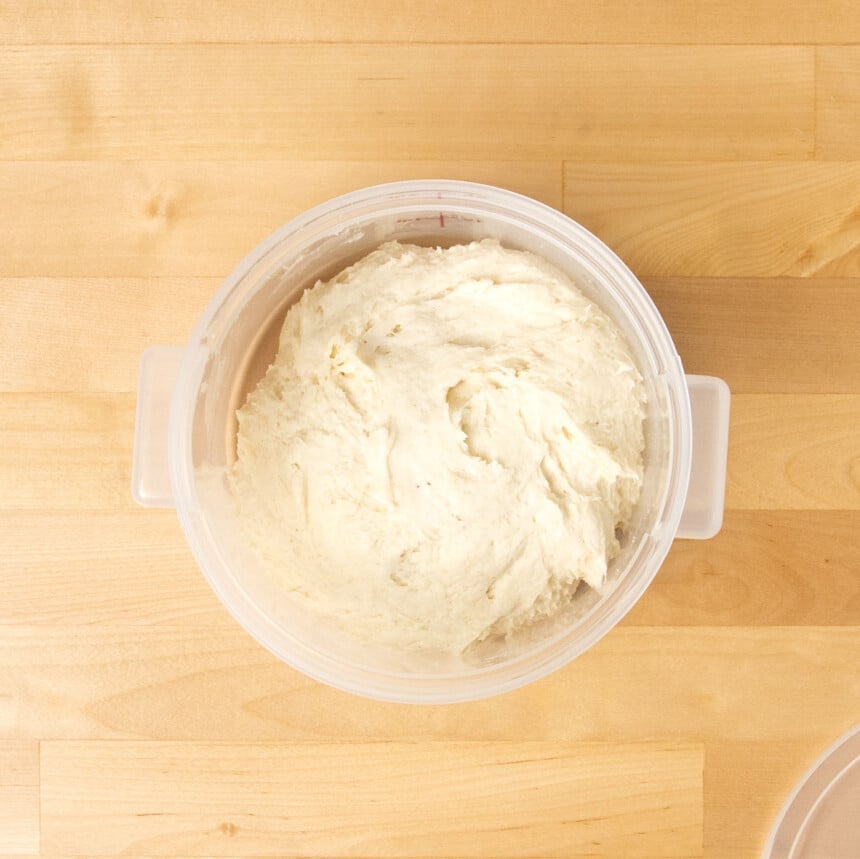
- Let the dough rise in a sealed container in the refrigerator for at least 1 hour
Shape the donut dough & let them rise
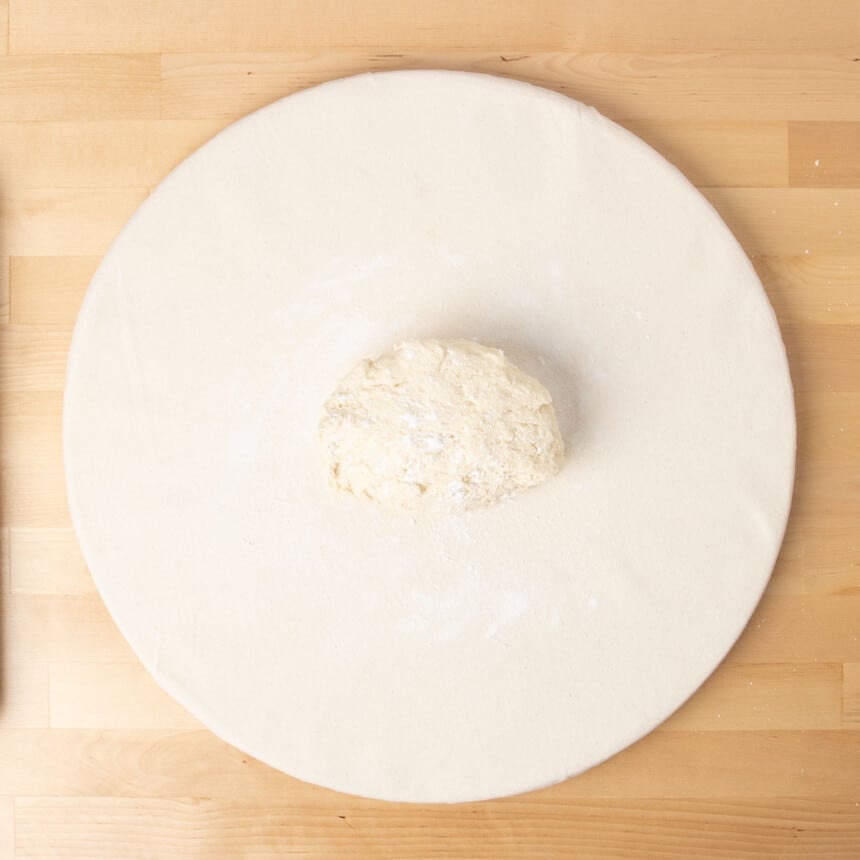
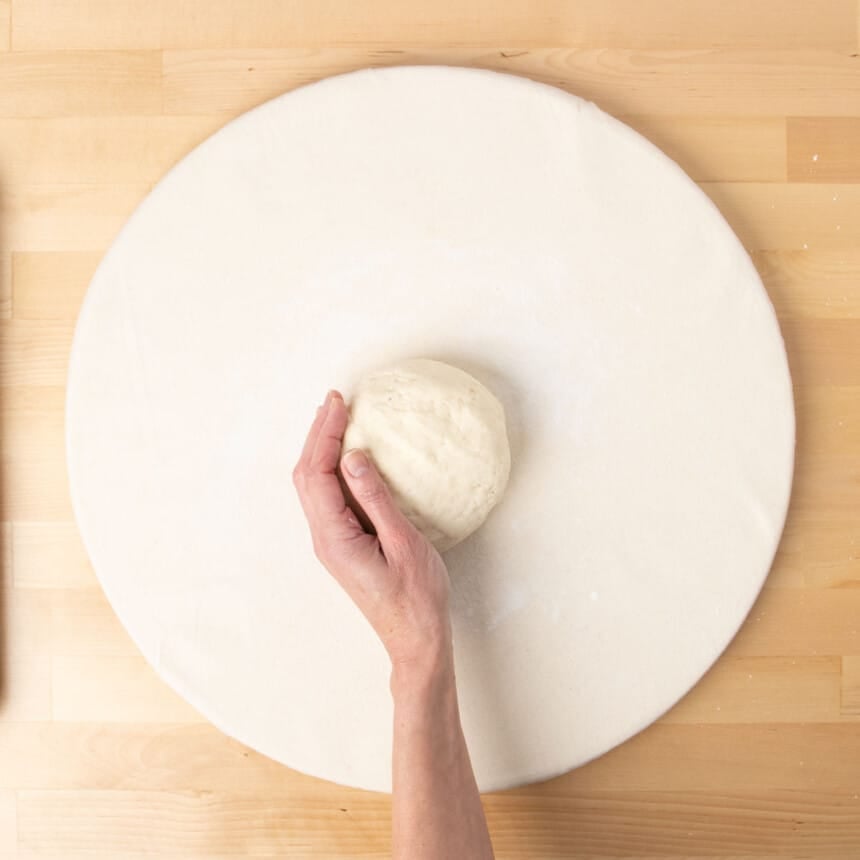
- Divide the dough in half, sprinkle with more flour, and shape into a round
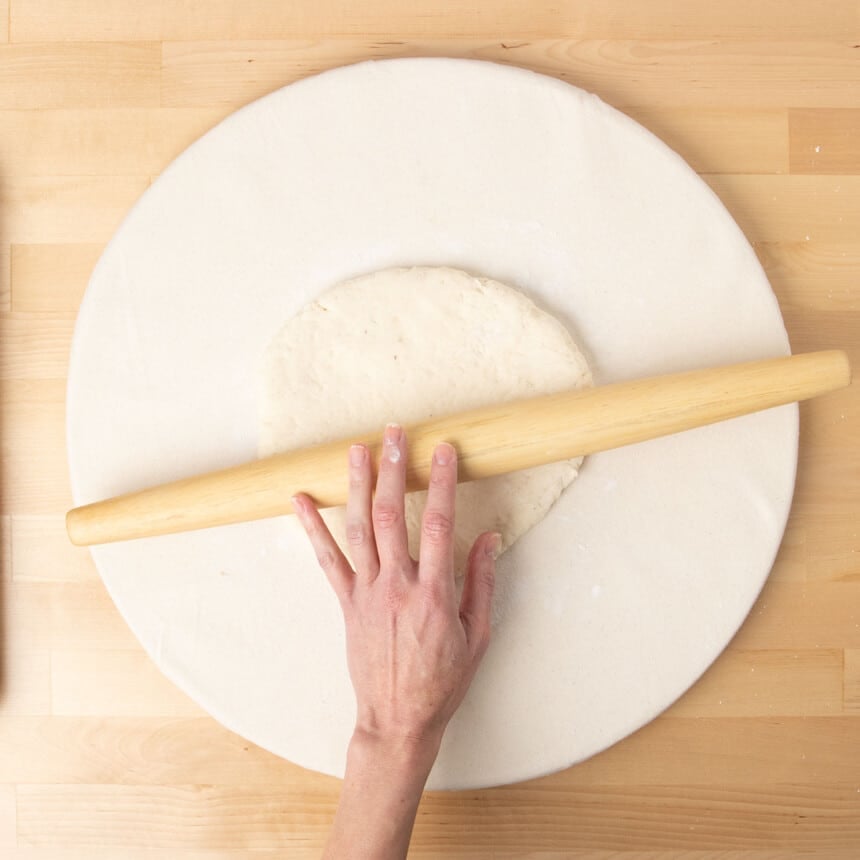
- Roll the dough about 1/2-inch thick
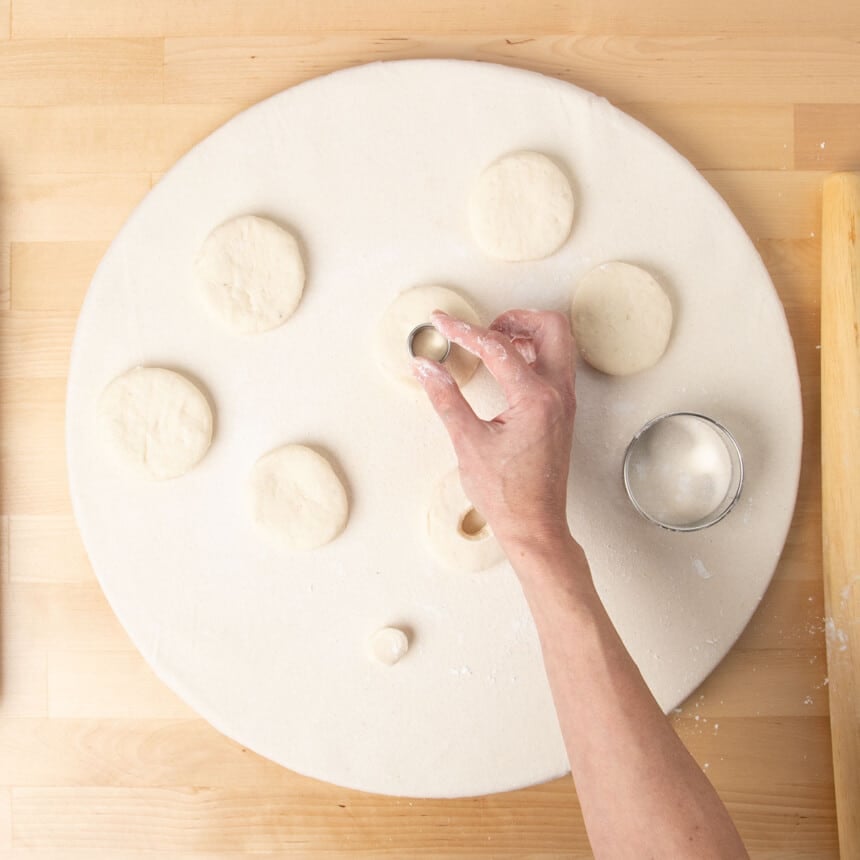
- Cut out round shapes from the dough, and small center holes
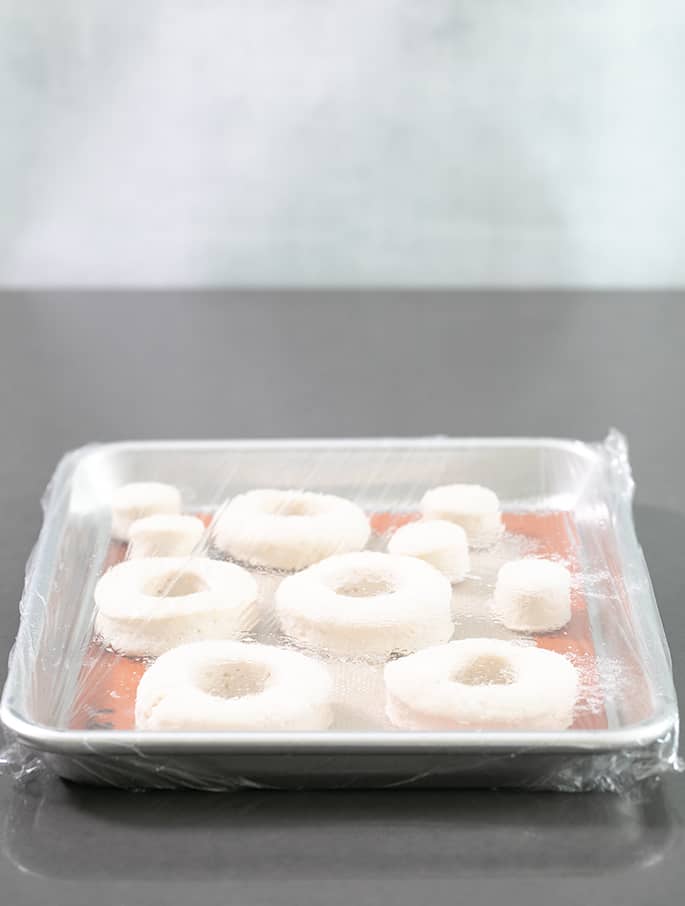
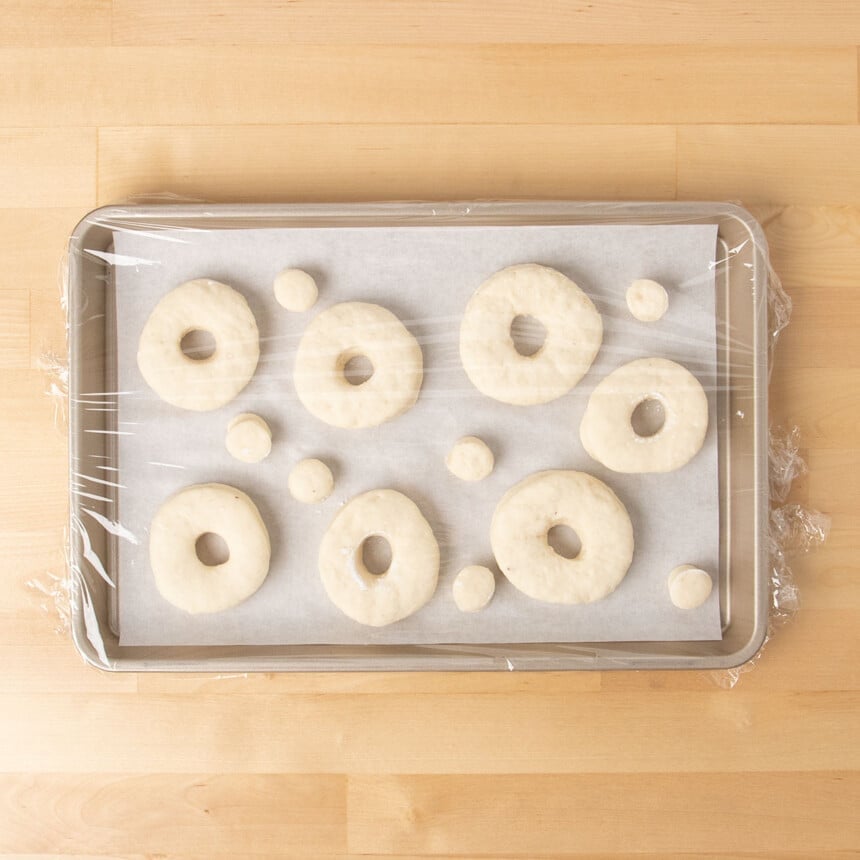
- Place the donuts (and donut holes) on a lined baking sheet, cover, and let rise at room temperature for about 1 hour
Fry the risen donuts & glaze
- As soon as the donuts appear to be nearly 1 1/2 times as big as they started (not a full doubling), bring your frying oil to a bit over 350°F
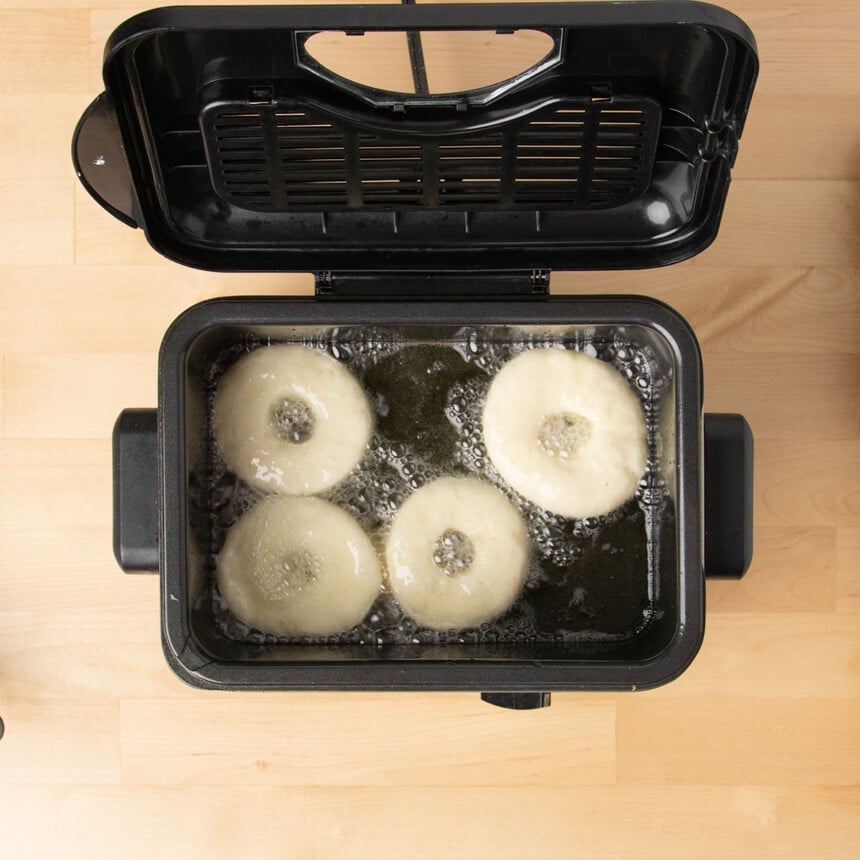
- Fry the risen donuts and holes a few at a time without crowding the oil
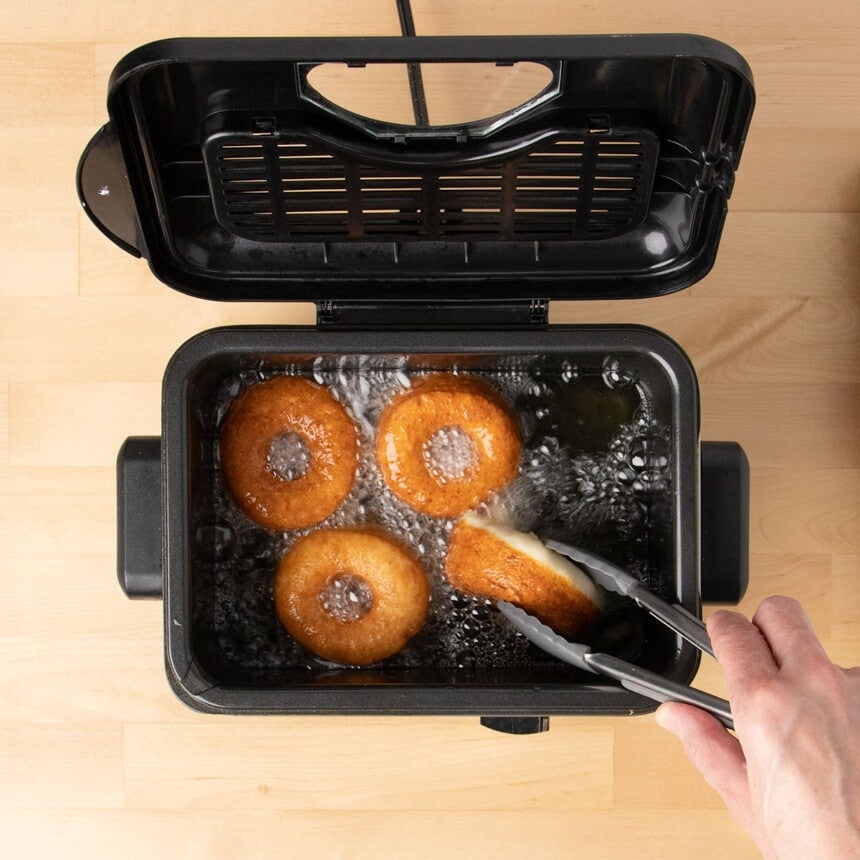
- Flip and let fry all the way through on the other side
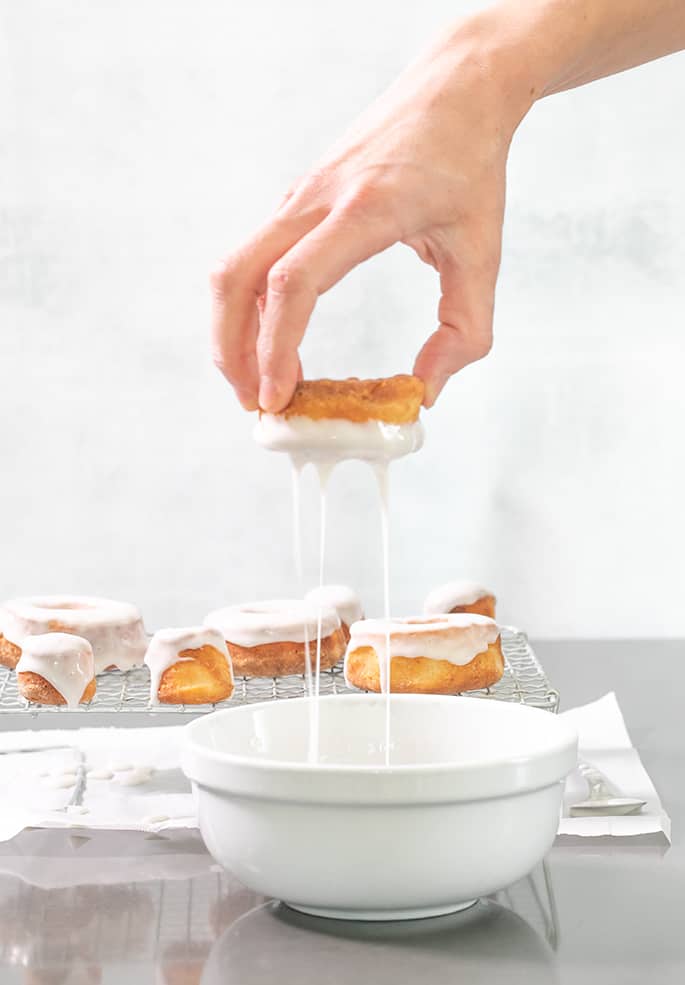
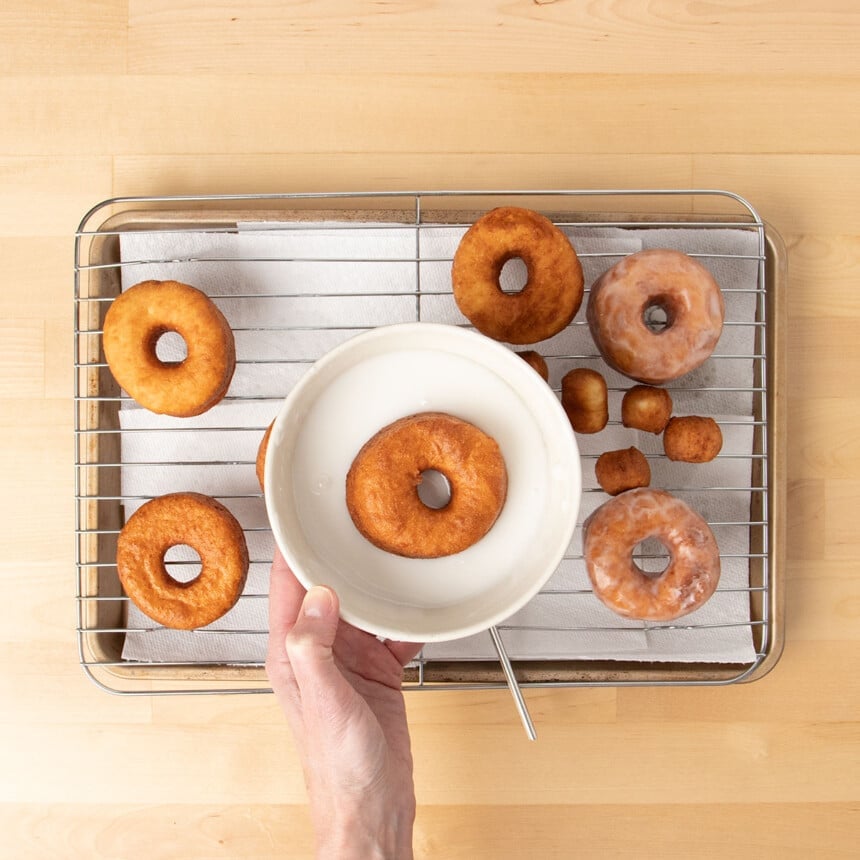
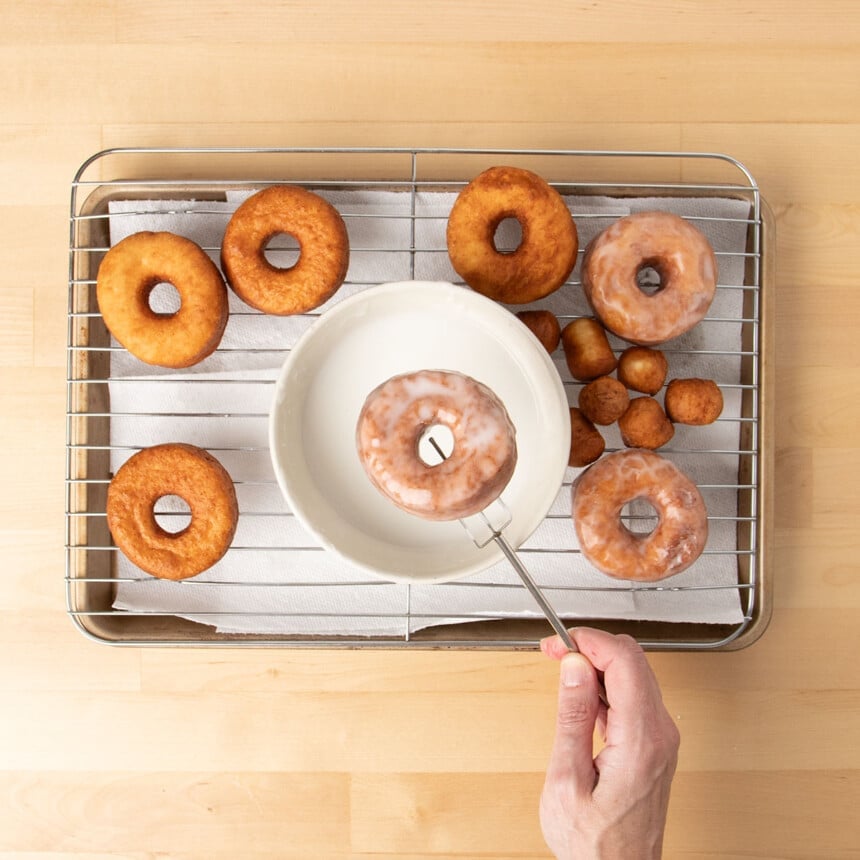
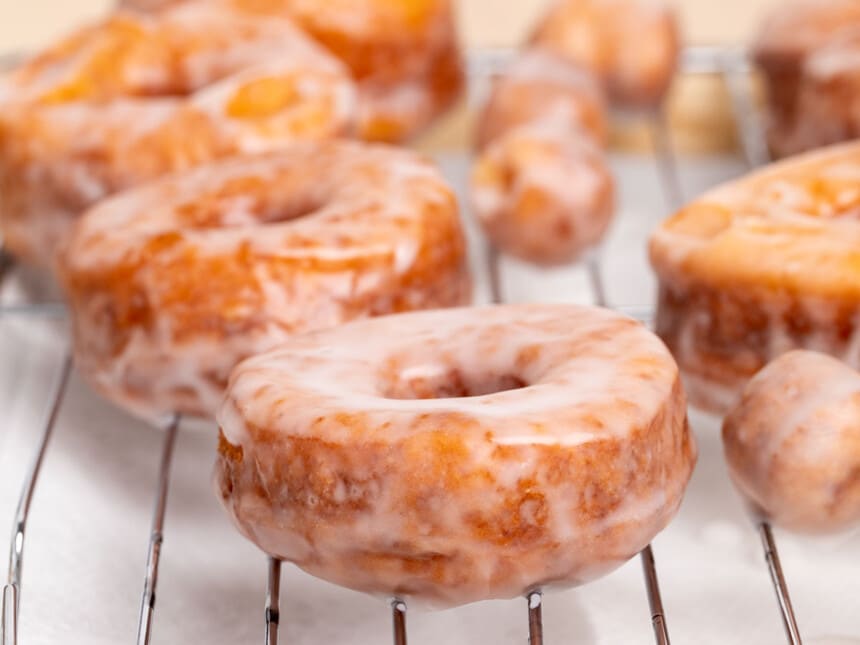
- Dip warm donuts on both sides in a simple sugar glaze, then let set on a wire rack
- Serve immediately!
How to cook your gluten free donuts
Oil frying gluten free
Old-fashioned donuts like made from this yeast-raised gluten free donut recipe are meant to be fried, not baked. If you’d like to begin with baked donuts, I’ve got plenty of recipes for cake donuts from classic gluten free vanilla donuts to gluten free chocolate donuts. For cake donuts, you’ll make them in doughnut pans, which are like muffin pans but with wells shaped like donuts, with a raised center.
When you bake a yeast-raised donut, it mostly tastes like, well, a really light gluten free bagel. Deep-frying can be messy and time-consuming, but it shouldn’t result in oily donuts at all.
Just be sure your oil is hot enough, and the outside of the donut will seal quickly once it hits the oil. Then, the inside of the donut will just cook evenly and without any oil for the rest of the time.
Use “dirty” oil for the best gf fried donuts
Oil that is not quite clean is best for frying. Frying a few chunks of old bread in the oil before using it for the doughnuts will help all of your doughnuts come out golden brown and delicious. They brown quickly.
I first published this gluten free donut recipe way back in 2012, long before I had ever even heard of an Air Fryer. I fried them, and many of you who have made them over the years have done the same.
When they’re deep fried in oil, donuts are more tender inside and crisp outside when they’re deep fried in oil. An air fryer is so incredibly easy, though…
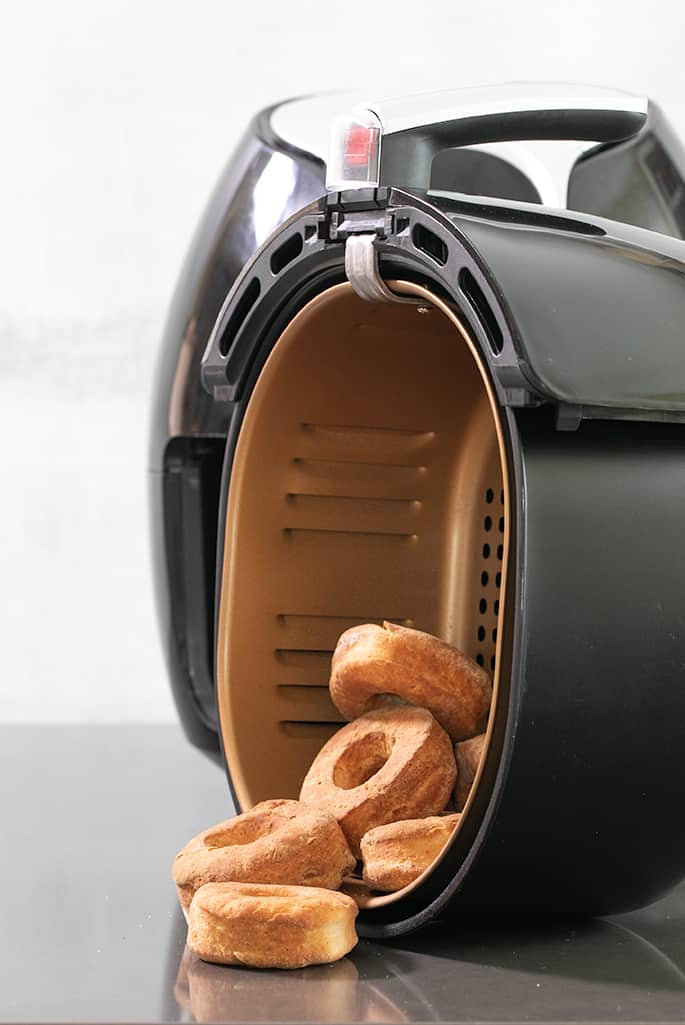
Air frying your gluten free donuts
As we discussed when we made our gluten free chicken nuggets, an Air Fryer is not really created to “fry” anything at all. I think of it more as a very efficient, rather small convection oven.
But by making fried wontons in the Air Fryer, I learned that you can make foods that do taste like they were, in fact, deep fried in the Air Fryer. Of course, you don’t use nearly as much oil as you do in deep frying, where you use at least 2 inches of oil for frying.
You can still give food cooked in the Air Fryer that “fried” taste. Just spray or brush the food generously with nonaerosol cooking oil spray.
You can also use another high-heat-safe cooking oil, like avocado oil. It’s just easiest to evenly distribute it on the food when it’s in spray form. You’ll still be using far less oil than you otherwise would.
More tips for making the best gluten free donuts
Use the right gluten free flour blend
In gluten free baking, the most important ingredient is the gluten free flour blend you’re using. After all, I’m replacing conventional wheat flour and building a whole recipe around a well-balanced all purpose gluten free flour blend.
If you use one of my recommended gluten free flour blends and follow the recipe precisely, including how to handle the dough and what temperature the ingredients must be in, you’ll be rewarded with perfect fried donuts! If you use an inferior blend, and unfortunately there are many, in a shaped yeasted gluten free bread recipe, it won’t turn out.
Use a stand mixer if you can
If you’ve got access to a stand mixer, I highly recommend you use it for mixing your donut dough. It will be a lot less work for you, and the dough will come out nice and smooth with all the ingredients properly incorporated. Otherwise, try using a food processor, but this isn’t the sort of dough you can make successfully by hand.
The longer the raw dough chills, the better the flavor
Once you’ve made the dough, refrigerate it in a sealed container for at least an hour. This gives the flour time to absorb the liquid, making it much easier to handle—and the yeast time to develop flavor. Although the dough is suitable for use after chilling for an hour, try leaving it in the fridge overnight, if possible.
Don’t skip the candy thermometer
If you’re frying these gluten free yeast donuts the old-fashioned way in a pot of oil, you definitely want to use a candy thermometer to ensure your oil reaches 350°F.
If your oil is too cold, your gluten free fried donuts will absorb oil as they cook, resulting pale, greasy lumps. If your oil is way too hot, the outsides of your doughnuts will darken and possibly burn before the center is done cooking. Your donuts should bubble vigorously and begin to fry as soon as you place them in the oil.
How to store fried gluten free donuts
Gluten free recipes, especially for baked or fried goods, have a bit of a reputation of coming out dry. This is because gluten free flour tends to be drying; it absorbs the moisture in recipes like a sponge.
However, not only do these gluten free fried doughnuts come out soft and fluffy, they stay that way for several hours. That comes from a recipe that was properly developed to be made gluten free from the start, with the right balance of ingredients, measured properly.
For as delicious as these gf fried donuts are out of the fryer or when still warm, they don’t store well beyond a few hours. After about five hours, you’ll notice these donuts hardening up. You can always keep the dough in your refrigerator and fry a gluten free donut (or three) as needed.
Can I make the dough in advance?
Absolutely! You can enjoy fresh yeasted doughnuts whenever you’d like by preparing the donut dough in advance and storing it in the fridge. Remember, the raw dough stays good in a sealed container in the refrigerator for up to 4 days, so you can fry up warm donuts rather than settle for cold, hard ones.
Gluten-free donuts substitutions and ideas
Dairy free
I’ve made these donuts dairy free quite easily by replacing the unsalted butter with virgin coconut oil and using unsweetened almond or coconut milk (in the carton). Those substitutions work perfectly well.
You can also replace the butter with Melt VeganButter or Spectrum nonhydrogenated vegetable shortening, each melted and cooled.
Egg free
Since there are only one egg and one egg white in this recipe, you can try replacing the egg with a “chia egg” (1 tablespoon ground chia seeds + 1 tablespoon lukewarm water, mixed and allowed to gel).
Try replacing the egg white with aquafaba (the brine from a can of chickpeas). I haven’t tried either of these substitutions, so you’ll have to experiment!
Apple cider vinegar substitute
In place of apple cider vinegar, you can another neutral or full-bodied vinegar. I would not use a particularly bright, tart vinegar, like white wine vinegar.
White balsamic vinegar is rather mellow. That works well in place of apple cider vinegar. You can also use freshly-squeezed lemon juice.
Refined sugar-free?
The gluten free donut recipe makes dough that is only lightly sweet, with only 1/2 cup of granulated sugar in the whole batch. If you’d like to make the donuts without refined sugar, you can try.
You can try replacing the granulated sugar with an equal amount, by weight, of coconut palm sugar. The donuts will be darker in color.
If you’d like to try using a sugar replacement, I recommend Lankato monkfruit white sweetener or Swerve granulated sugar replacement. You may have to add some more milk as those sugar replacements tend to be drying.
The glaze is essentially all sugar confectioners’ sugar. If you can’t have refined sugar, I recommend just eliminating it entirely.
Filling and topping ideas
Plain gluten free glazed doughnuts are amazing, but if you’re seeking something a little more exciting, here are a few ideas:
- Chocolate – let your gluten free fried donuts cool a bit, then drizzle them or tip them in a chocolate glaze
- Jelly donuts – use a pastry bag to make gluten free jelly doughnuts — just skip the hole in the donut, and pipe your favorite flavor into the center of the donuts after frying
- Pie filling – for a richer taste, use your favorite pie filling in place of jelly
- Powdered sugar coating – roll a freshly fried donut in powdered sugar as soon as it comes out of the fryer. Let it set, then coat it again after it’s begun to cool for a completely covering.
- Sprinkles – most sprinkles don’t add a lot of flavor, but they do add some texture and look beautiful. Just be sure to sprinkle them on before the glaze has set, so they’ll stay in place.
FAQs
Unfortunately, most donuts are not gluten free. This is because manufacturers use wheat flour to make their doughnuts. These donuts are gluten free because they’re made with a gluten free recipe!
No! There is no such thing as a Krispy Kreme gluten free donut. I’m serious when I say that my recipe for gluten free yeasted donuts is good enough to be a Krispy Kreme copycat recipe.
You may have overmeasured the milk a bit, but generally this is a relatively sticky dough. Feel free to sprinkle the surface and the dough lightly with more gluten free flour as you shape it to prevent it from sticking. Just work with a light touch so the dough doesn’t absorb all of the extra flour. If the raw donuts are too dry, they won’t rise.
Yes, I now recommend allowing this donut dough to have the first rise in a sealed container in the refrigerator. When I first made this recipe, I honestly didn’t bother. At the time, gluten free yeast bread dough wasn’t considered stable enough to shape properly.
Ever since I developed the recipes for Gluten Free on a Shoestring Bakes Bread, though, I’m more inclined to let gf yeast dough rise twice. The first rise, ideally, is slowly in the refrigerator. It not only makes the dough easier to shape, but it allows the dough to develop that yeasted flavor that I really love. The second rise is after shaping.
The differences between cake donuts and yeast donuts lie in how they’re prepared and their textures. Cake donuts tend to be sweeter, and because they’re not made with yeast, they don’t have the same airy texture. As they’re generally cooked in an oven using doughnut pans, these baked donuts are a bit more dense, like cake. Yeast donuts, on the other hand, are soft and fluffy after they’ve been fried.
Vegetable oil is probably the most popular oil for frying donuts, but you can use any neutral oil of your choosing. You can go the route of Krispy Kreme and use vegetable shortening, or you can try canola oil, peanut oil, or sunflower seed oil. Anything with a comparably high smoke point will work.
Yes! It’s easy to turn plain gluten free doughnuts into jelly donuts. Don’t cut a hole in the center of the donuts before you rise and fry them. Then, fit a pastry bag with a long angled Bismark piping tip, or just snip off the end. Place a jam or jelly of your choosing (I love grape jelly and strawberry jam) into the bag. Cut a hole in your doughnut using a small knife or skewer (or the end of your Bismark tip), and then pipe the filling into the doughnut just until it starts to spill back out.
Gluten Free Donut Recipe
These yeast-raised, gluten free donuts are so soft and fluffy inside, golden brown outside, and taste just like Krispy Kreme!
Yield: 12 donuts
Prevent your screen from going dark
Ingredients
For the donuts
- 2 ¼ cups (315 g) all purpose gluten free flour blend (I used Better Batter; click through for full info on appropriate blends without which the recipe will not turn out), plus more for sprinkling
- 1 ½ teaspoons xanthan gum omit if your blend already contains it
- ⅓ cup (47 g) tapioca starch/flour add this ingredient even if your all purpose blend contains tapioca starch
- ½ teaspoon kosher salt
- ¼ teaspoon cream of tartar
- ½ teaspoon baking soda
- ½ cup (100 g) granulated sugar
- 2 ½ teaspoons (8 g) instant yeast also called breadmaker or rapid rise yeast
- ½ teaspoon fresh finely-ground nutmeg optional
- 1 teaspoon apple cider vinegar
- 1 (50 g (weighed out of shell)) egg at room temperature
- 1 (25 g) egg white at room temperature
- 1 cup (8 fluid ounces) milk at room temperature, plus more as necessary
- 4 tablespoons (56 g) unsalted butter melted and cooled
- Oil for frying or non-aerosol oil spray for Air Frying
For the glaze
- 1 cup (115 g) confectioners' sugar
- 2 tablespoons (42 g) Lyle’s Golden Syrup (or honey)
- 2 tablespoons (1 fluid ounce) water plus more as necessary
Instructions
Make the donut dough.
-
In the bowl of your stand mixer, place 2 1/2 cups flour, the xanthan gum, tapioca starch, salt, cream of tartar, baking soda and sugar. Whisk to combine well. Add the yeast and optional nutmeg, and whisk again to combine well.
-
Fit the mixer with the paddle attachment.
-
Add the vinegar, egg, egg white, milk and melted butter, and mix to combine. Mix on low speed until the liquid is absorbed by the dry ingredients, then turn the mixer speed to high and mix for about 2 minutes or until very well-combined. It should take on a bit of a whipped appearance.
-
The dough will be wet but should scrape easily off the sides of the mixer with a spatula. Beat in more milk a drop at a time as necessary to get the dough to move freely in the mixer.
-
For best results, spray the inside of a lidded bucket or bowl with cooking oil spray, scrape the donut dough into the container, and cover the bucket or bowl.
-
Place in the refrigerator to rise and chill for at least 1 hour, or up to 4 days. You can work with the dough immediately, though, if you prefer. It will just be stickier and a bit harder to handle, and will have less flavor.
Shape the dough.
-
Line rimmed baking sheets with unbleached parchment paper and set them aside.
-
When you’re ready to work with the dough, divide the dough in half and place the first half onto a lightly floured surface.
-
Sprinkle the dough lightly with some extra flour and turn over on itself a few times to create a smoother dough.
-
Press the dough into a disk, sprinkle lightly with more flour, and roll it out about 1/2 inch thick. The dough will begin as relatively sticky, so keep sprinkling lightly with more flour to prevent the rolling pin from sticking, and move the dough frequently.
-
Flour a doughnut cutter or biscuit or large round cookie cutter (about 7 cm in diameter), and cut the dough into donut shapes. If you’re using a large plain round cutter instead of a donut cutter, use a much smaller cutter to cut out donut holes from the rounds (about 2.5 cm).
-
Place the donut shapes and the holes on the prepared baking sheets about 1 1/2-inches apart from one another. Gather scraps and reroll, then cut more shapes.
-
Repeat with the other half of the dough either now or in a few days. The dough keep in a sealed container in the refrigerator for up to 4 days.
Let the dough rise.
-
Cover the baking sheets with plastic wrap, and place in a warm, draft-free spot and allow to rise to about 150% of their original size. They won't fully double, but instead will end up about 1 1/2 times as large as they began.
-
This usually takes 45 minutes to 1 hour, but it can take less time in warm, humid environments and more time in cold ones. Be sure that the dough has begun to swell before you consider it done rising, or your donuts will be dense.
Air Fryer Instructions.
-
Spray the bottom of the Air Fryer basket with non-aerosol cooking oil spray. Place as many donuts and holes as will fit comfortably in the basket of your Air Fryer in a single layer, without crowding.
-
Spray or brush the tops of the donuts generously with cooking oil, and place in the Air Fryer. Set the machine to fry at 380°F for 12 minutes. Allow to cook for about 6 minutes.
-
Remove the basket carefully from the fryer and, using heat-safe tongs, flip each of the donuts and holes over. Spray or brush again generously with cooking oil, and return to the fryer.
-
Finish frying until lightly golden brown all over. Remove the donuts and place on a wire rack to cool. Repeat with the remaining donuts and holes.
Deep-frying directions.
-
In a large, heavy-bottom stock pot or electric deep fryer, heat at least 2 inches of oil to a bit more than 350°F.
-
Line a rimmed baking sheet or tray with paper towels, then place a heat-safe wire rack on top.
-
Once the oil reaches temperature, fry the donuts and holes in small batches for 2 to 3 minutes per side, or until golden brown all over.
-
Remove with tongs or a slotted spoon and drain on the prepared wire rack and baking sheet.
Make the glaze.
-
Make the glaze while the first batch of donuts is hot from the oil. You want to glaze them while they're still warm.
-
In a small-to-medium-sized bowl, place the confectioner’s sugar. Add the syrup or honey, and mix to combine into a thick paste.
-
Add water, a teaspoon at a time, and mix well until you have achieved a smooth and thickly pourable glaze.
-
Immerse the whole donut (or donut hole), while still warm, in the glaze, covering it on all sides. Lift the glazed donut from the mixture using a fork, allow any excess to drip off, and then return to the wire rack to set.
-
If the glaze thickens between batches, sprinkle in a drop or two of water and whisk again until smooth. Finish the the remaining donuts.
Notes
Nutrition information is per donut with glaze, calculated using an online source, and is inherently unreliable. It should not be used to diagnose, treat, or prevent any disease.
Nutrition
Serving: 1donut | Calories: 211kcal | Carbohydrates: 48g | Protein: 3g | Fat: 5g | Saturated Fat: 3g | Polyunsaturated Fat: 0.2g | Monounsaturated Fat: 1g | Trans Fat: 0.2g | Cholesterol: 26mg | Sodium: 187mg | Potassium: 78mg | Fiber: 2g | Sugar: 12g | Vitamin A: 169IU | Vitamin C: 0.01mg | Calcium: 30mg | Iron: 0.2mg

Thanks for stopping by!
Hi, I’m Nicole. I create gluten free recipes that really work and taste as good as you remember. No more making separate meals when someone is GF, or buying packaged foods that aren’t good enough to justify the price. At Gluten Free on a Shoestring, “good, for gluten free” just isn’t good enough! Come visit my bio!
